Even with all the glorified updates in the One UI 4, the camera app experience remains one of the glaring weaknesses of the Galaxy phone line. Here are the solutions you’ll need to follow.
1. No Other App Uses Camera
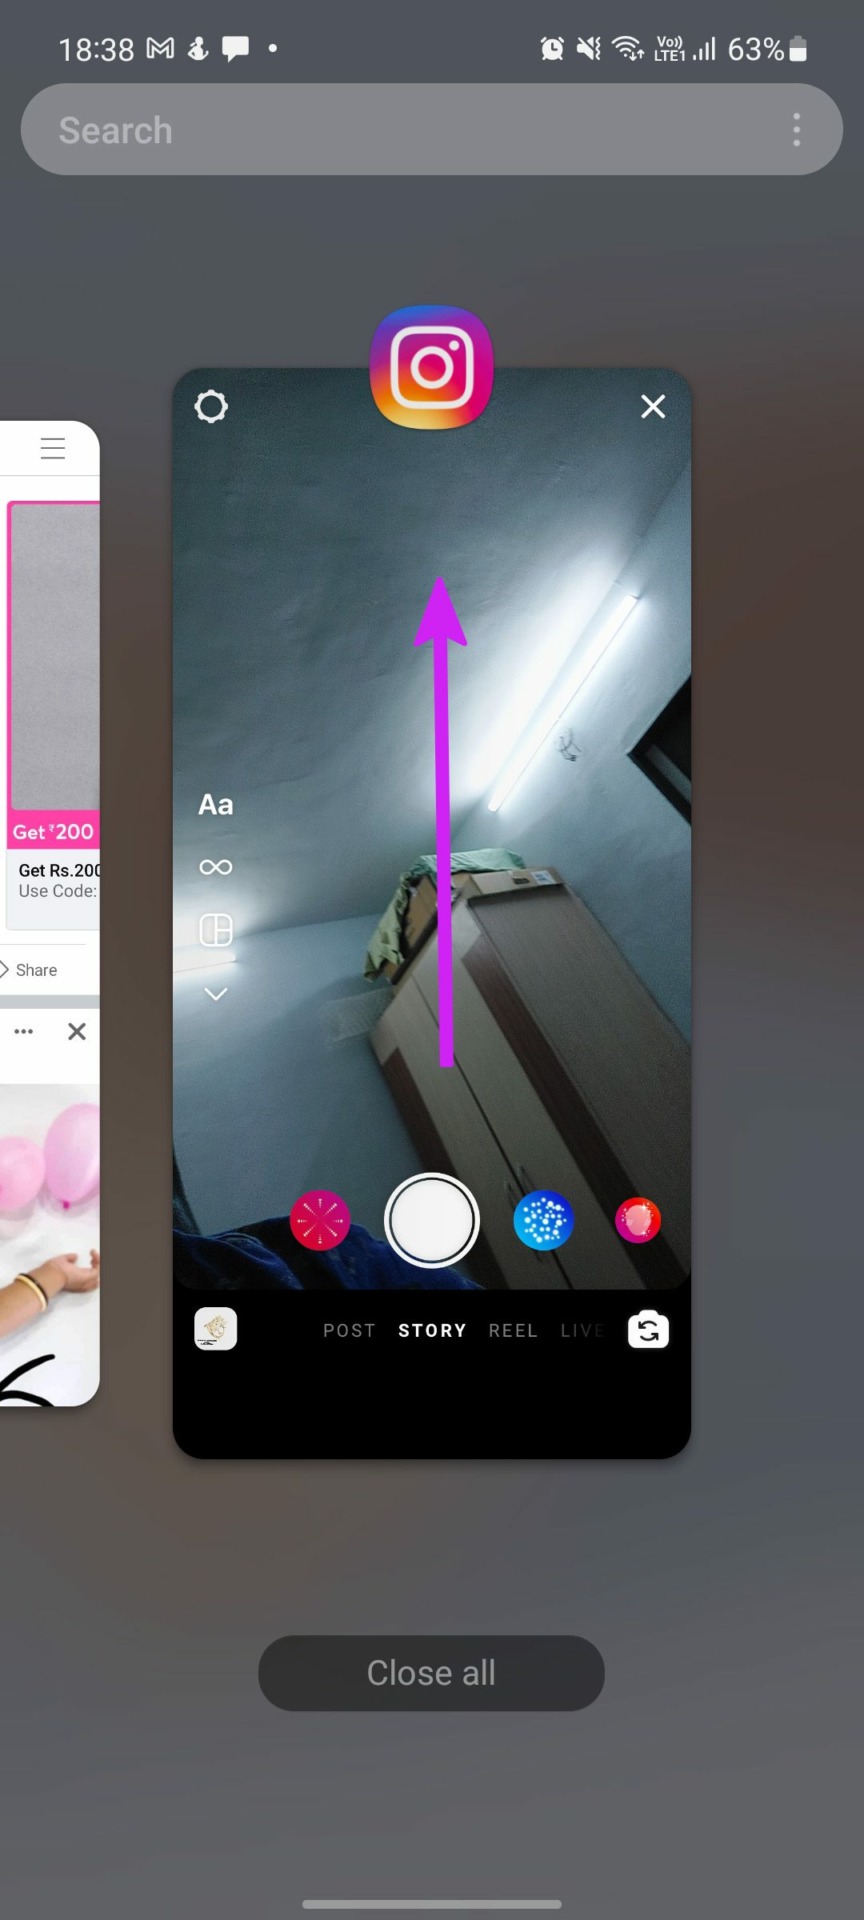
Applications like Instagram, Snapchat, WhatsApp, etc., come with a built-in camera interface to snap photos and share. If any other app is actively using the camera interface in the background, you might face problems with the primary Camera app on Galaxy phones. Open the multitasking menu (swipe up and hold, or use the recent menu if you are using navigation buttons) and remove apps using the camera on your phone.
Try to open the Camera app and check if you can see the viewfinder.
2. Force Stop Camera
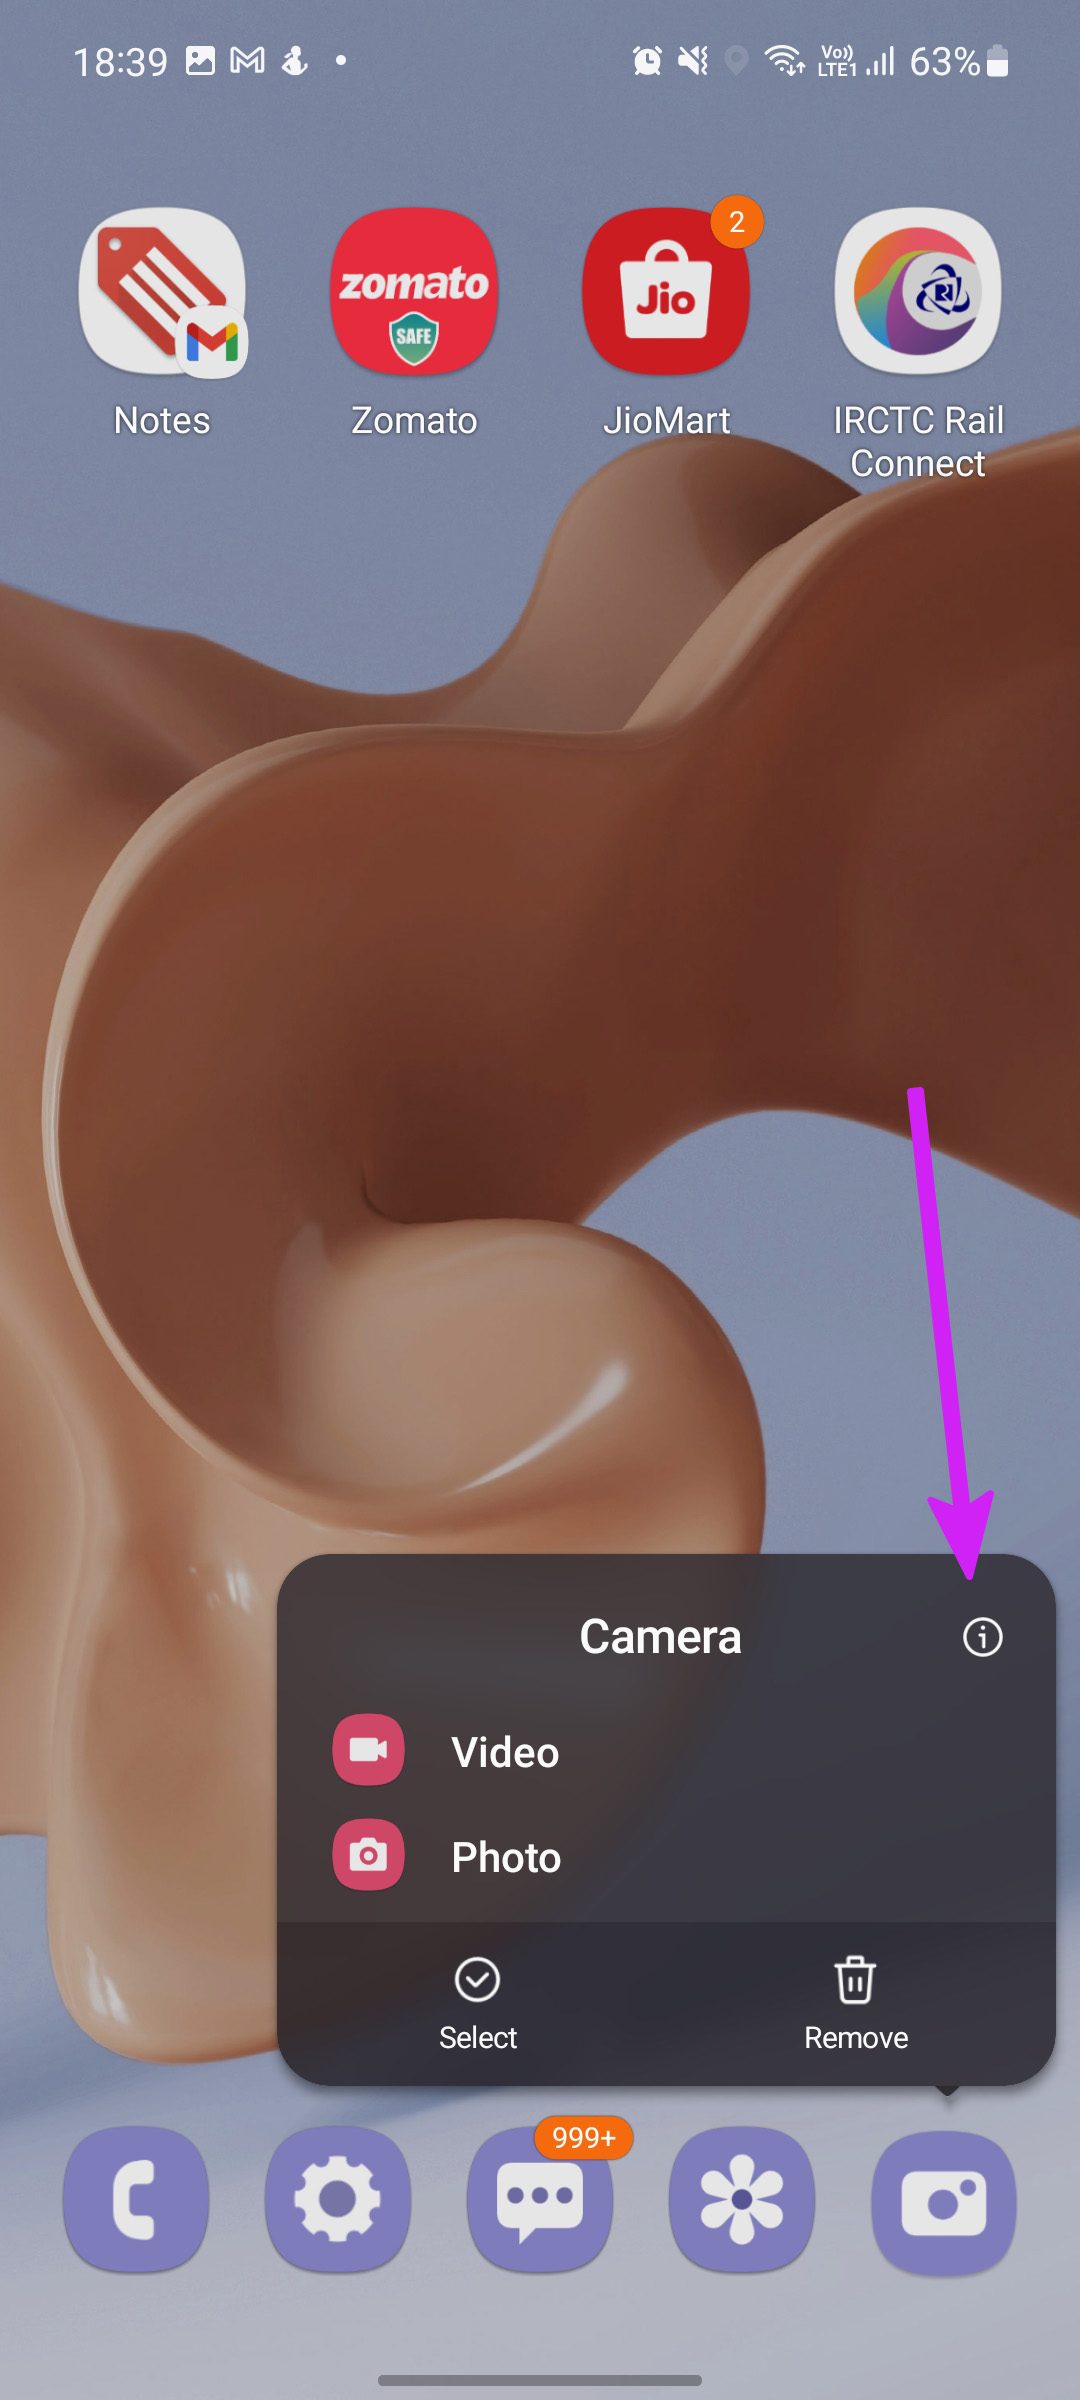
You might reboot the phone to fix minor glitches with system functions. Similarly, you can restart the Camera app to troubleshoot any lag and random errors. Here’s what you need to do. Step 1: Long-press on the Camera app icon and tap on the little ‘i’ button at the top.
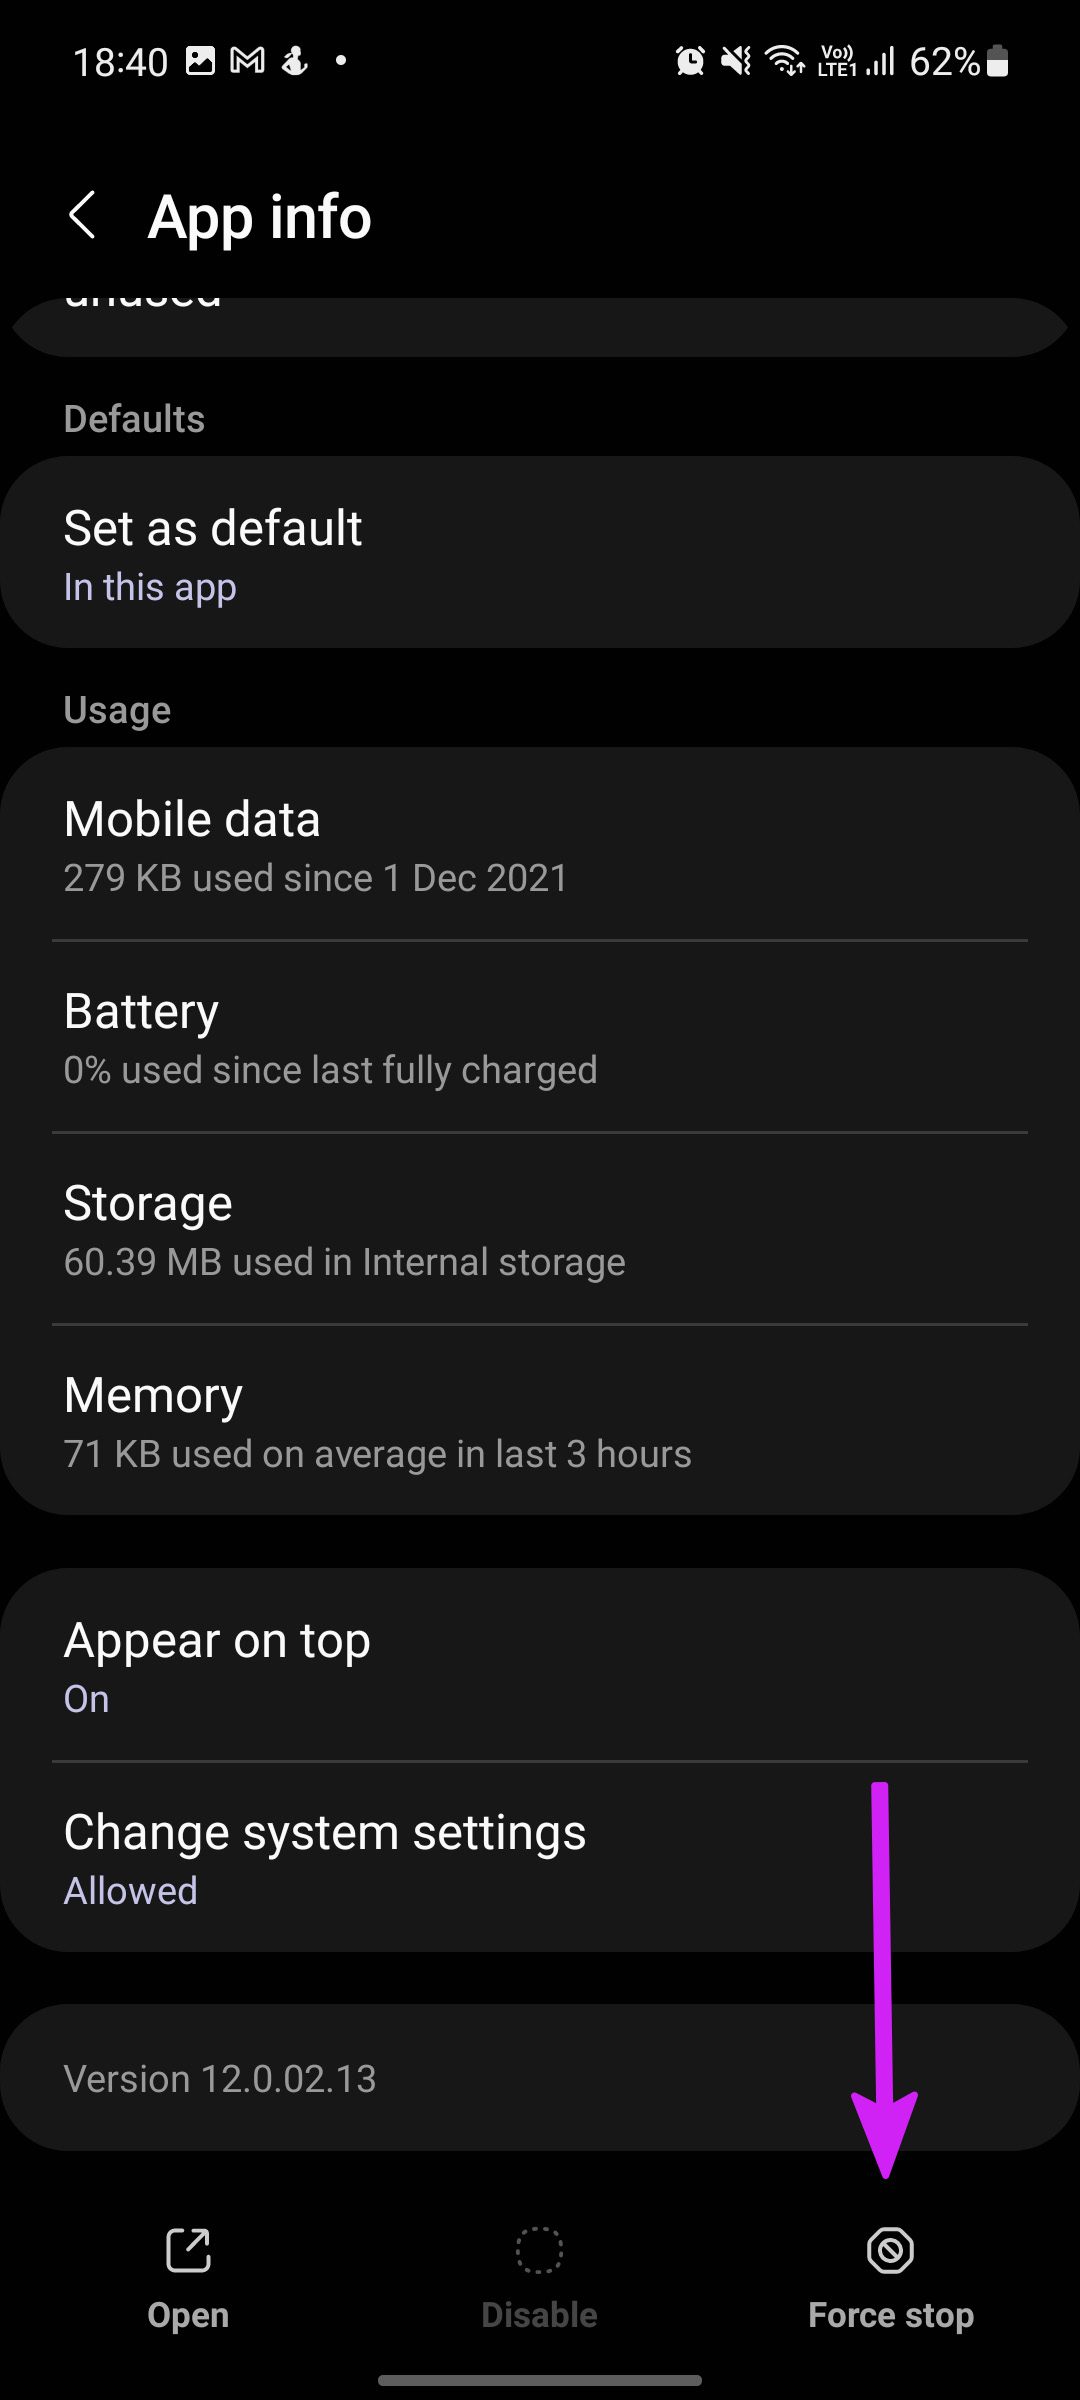
Step 2: Open the Camera info menu and select Force stop.
Return to the home screen and tap on the Camera app to launch it again.
3. Clear Camera Cache
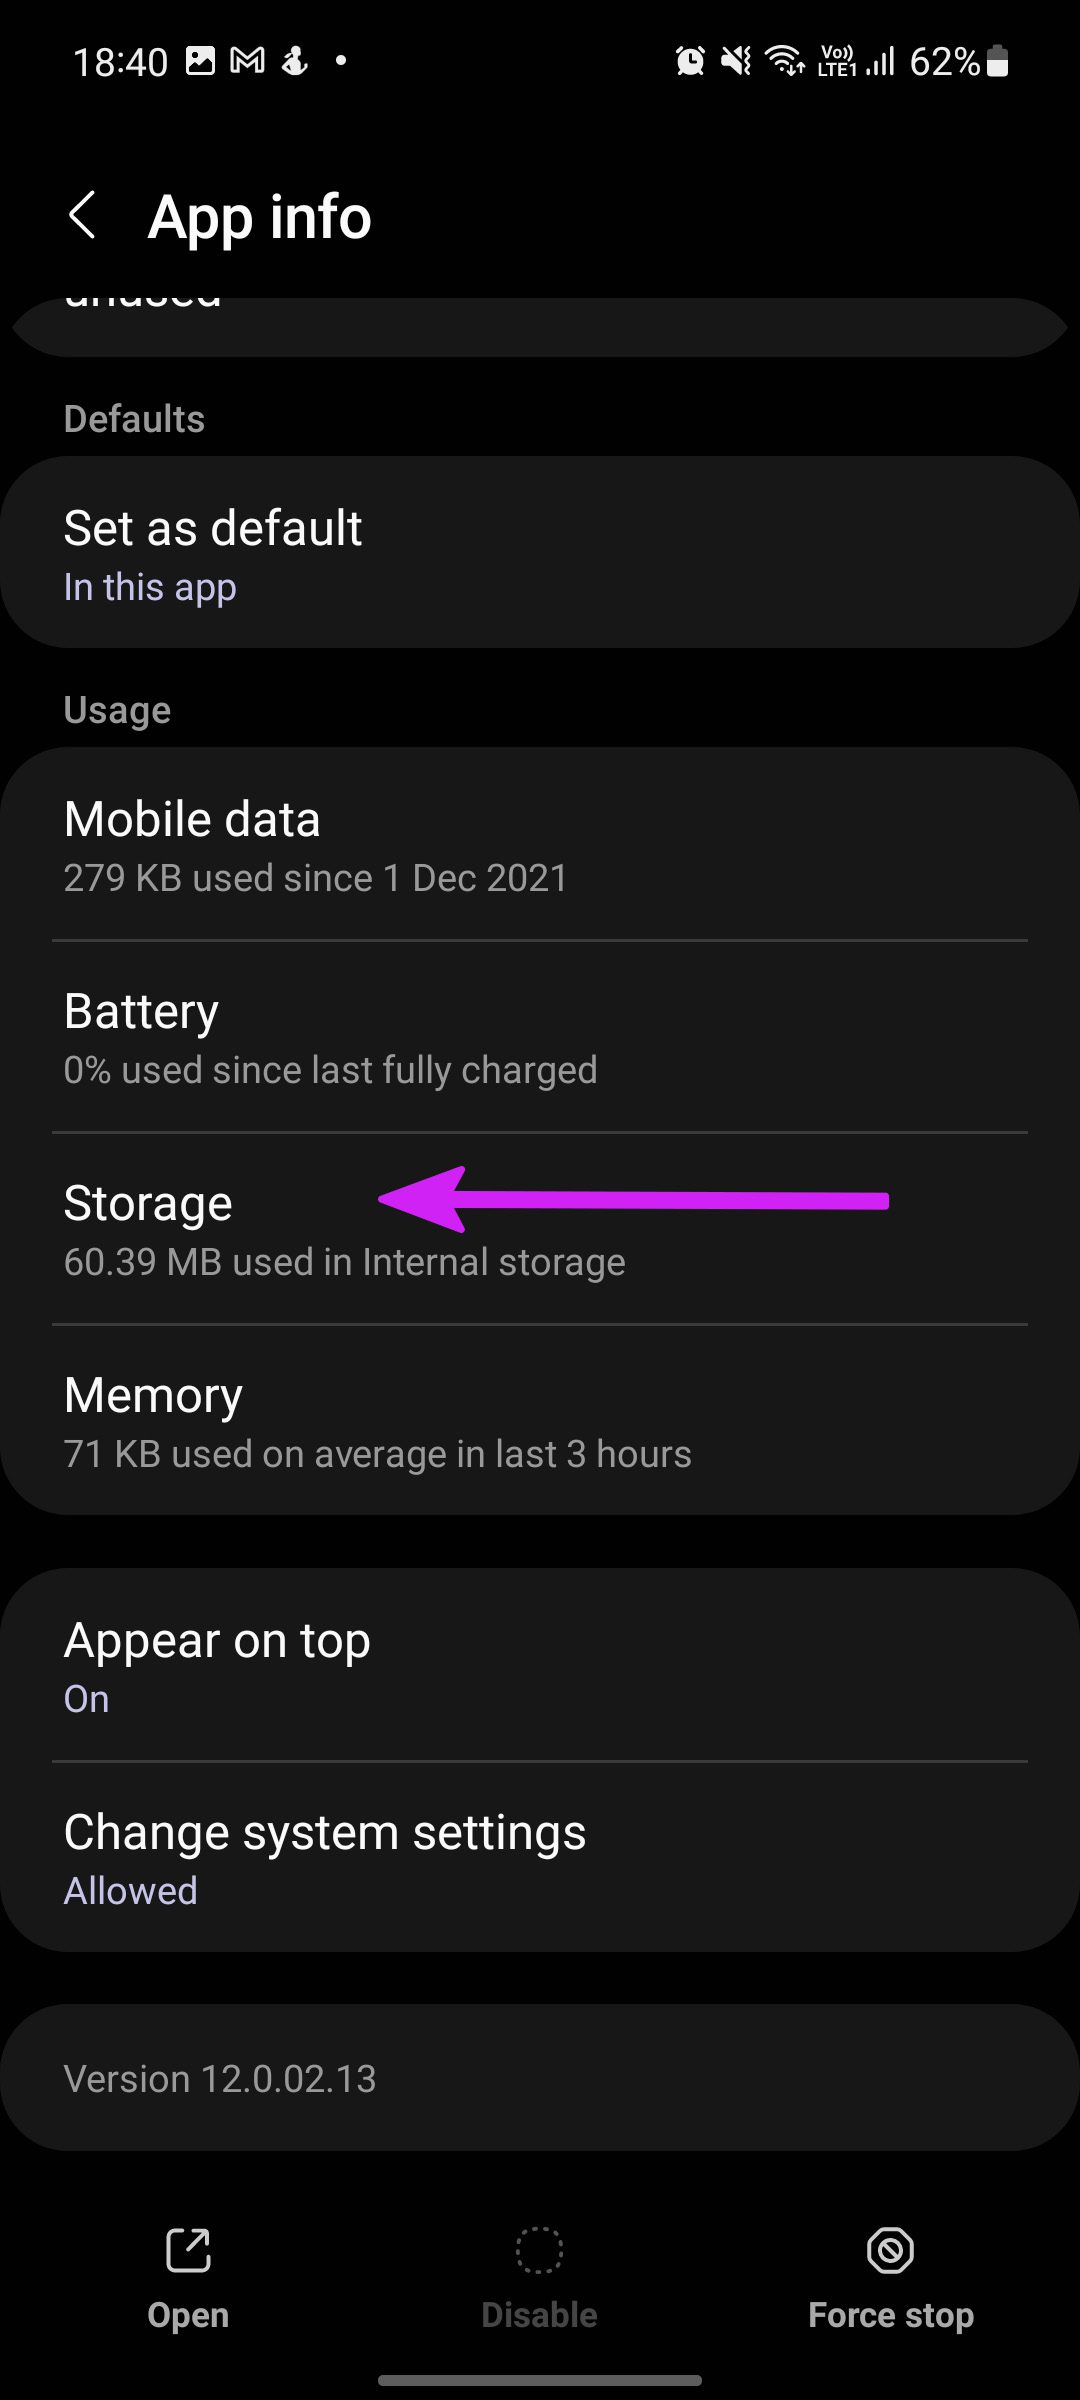
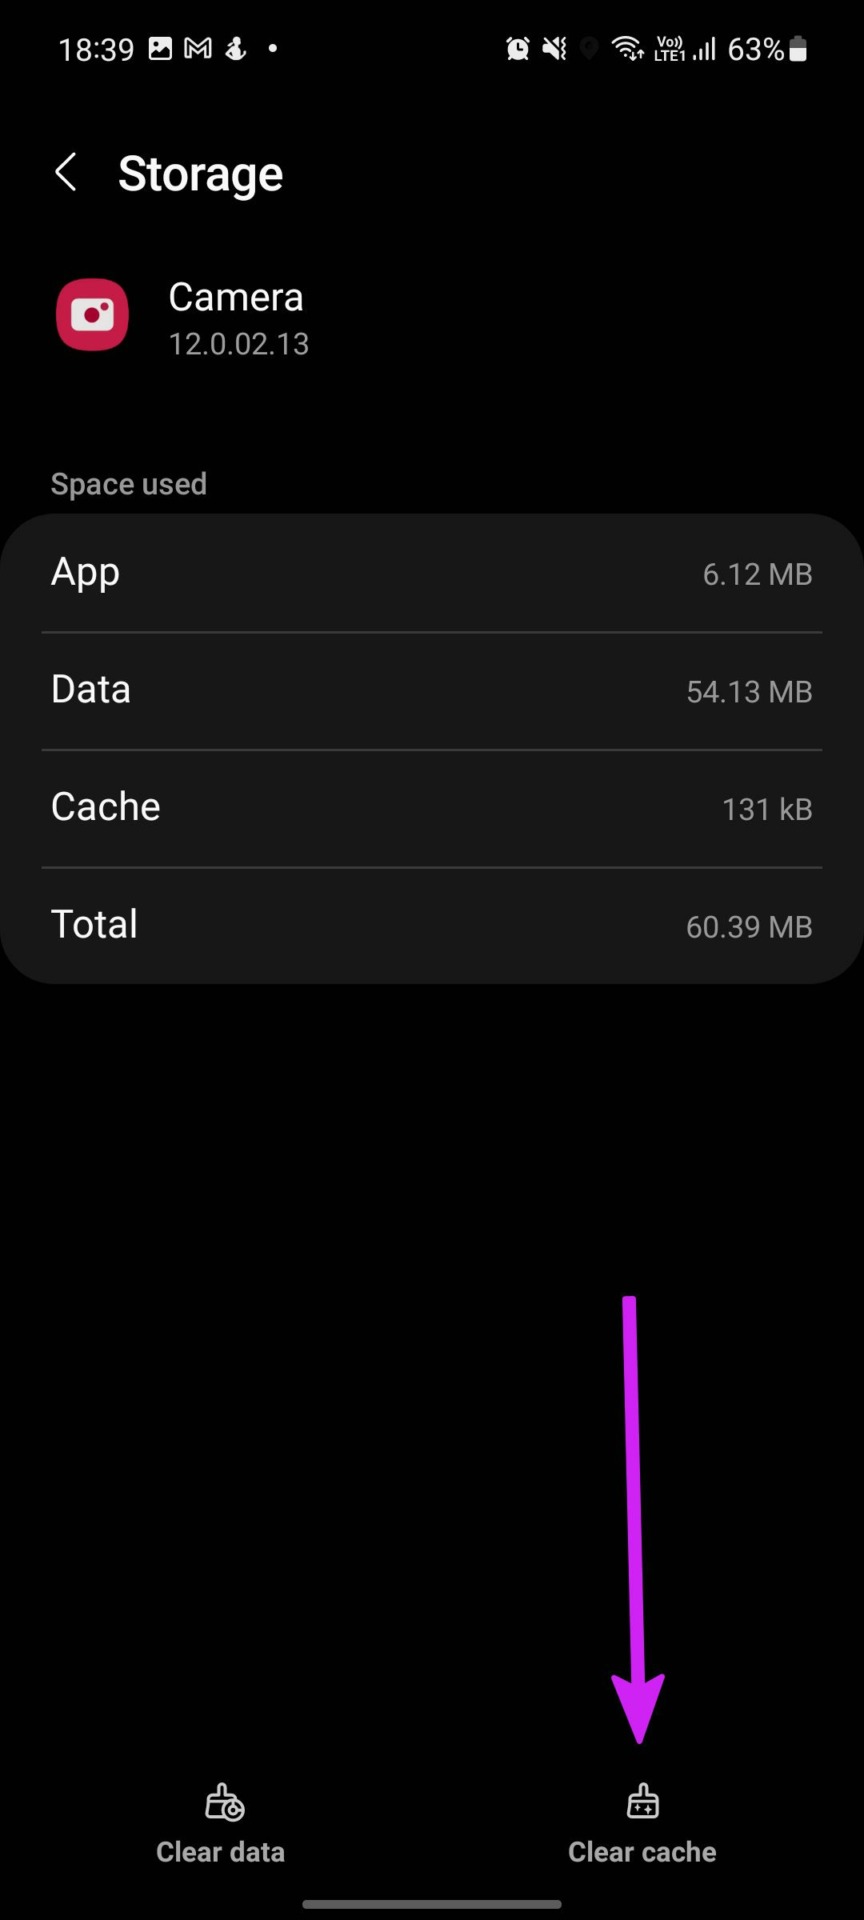
Like many other Android apps, the Camera app also collects cache data in the background to help improve app loading speeds and overall performance. But a corrupt cache can lead to camera failed errors. So, you’ll need to clear that cache. Step 1: Long-tap on the Camera app icon and open the info menu.
Step 2: Go to Storage and select clear cache from the following menu. After this, try using the Camera app for a while to see if still throws the error.
4. Check Camera App Permissions
When intalling different apps, they ask for permission to access the camera. If you have denied permission to any particular app that requires accessing the camera, the Camera app might not work as expected. Here’s how to confirm and fix that. Step 1: Long-tap on the Camera app icon and launch the app info menu. Step 2: Select Permissions and tap on Camera from the following menu. Step 3: Select the radio button beside the ‘Allow only while using the app’ option and you are good to go.
5. Disable Battery Saver Mode
It’s natural to use the battery saver mode to save some juice. However, you might face problems with the Camera app since it’s one of the power-hungry apps. This mode prevents the Camera app from running for long since it is power-hungry. So you can disable the Battery Saver Mode to check if that helps. Step 1: Swipe up and open the Settings app from the app drawer menu. Step 2: Scroll down to the Battery and device care menu. Step 3: Select Battery. Step 4: Disable Power saving toggle from the following menu.
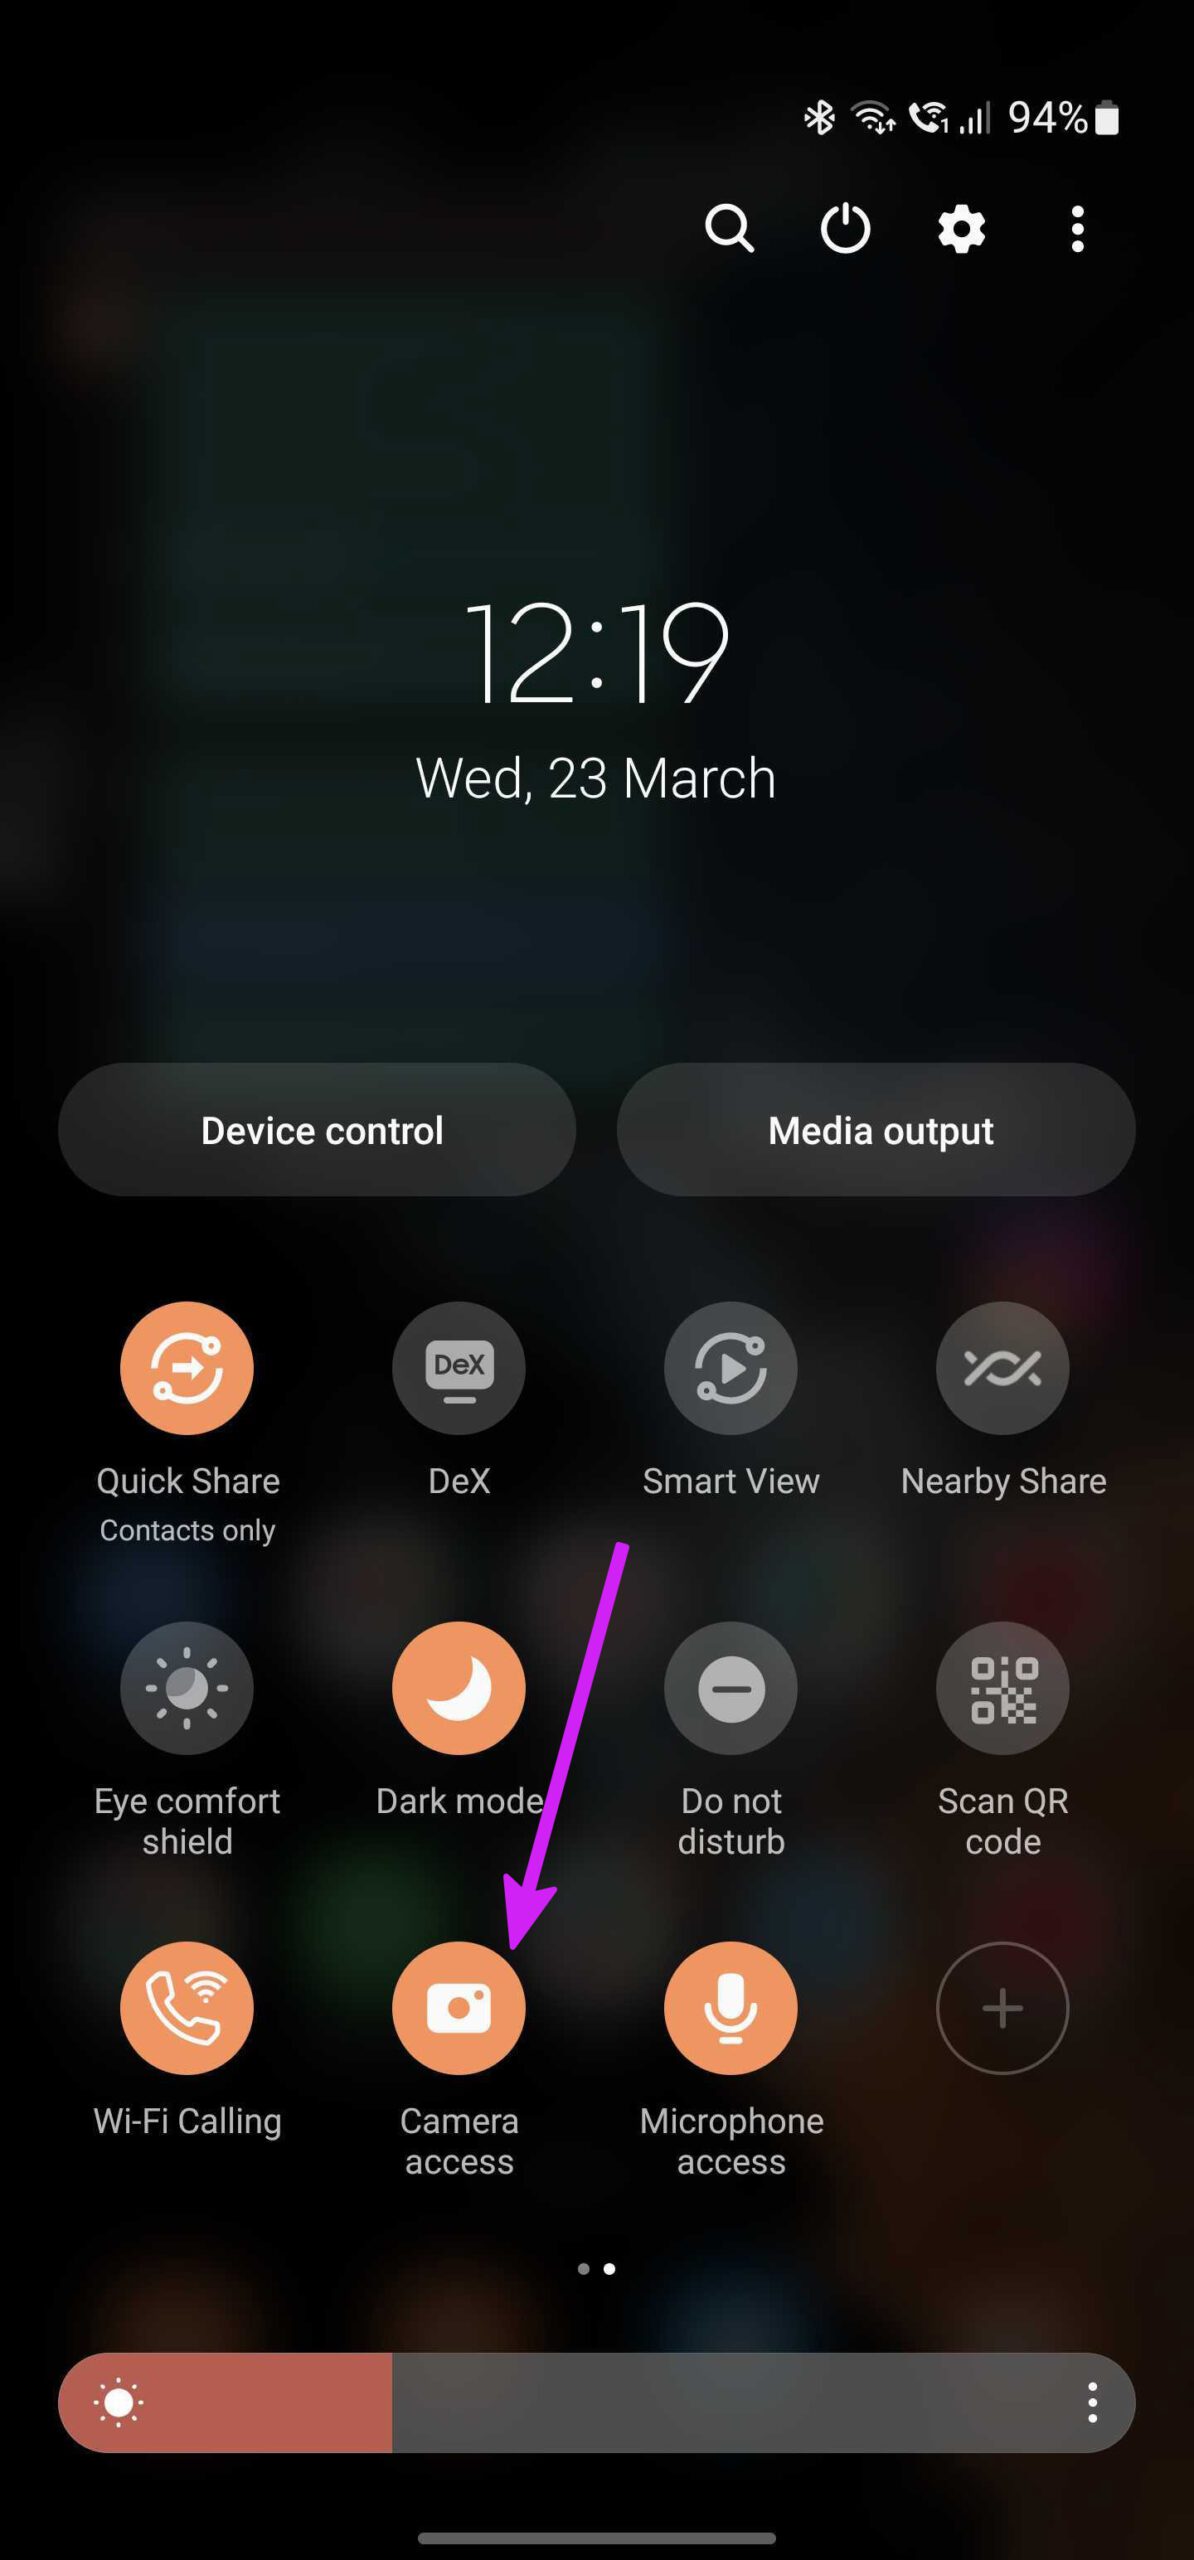
6. Enable System-Wide Camera Access
As a part of the privacy add-on in Android 12, One UI 4 allows you to disable camera functionality on your phone completely. If you have turned off the camera on your phone, no app can access it, even if you open the default Camera app. Swipe down and open the quick toggles menu. Enable the camera toggle, and you are good to go.
7. Make Sure Your Phone Temperature is Low
While using the phone outdoors in hot environments, the phone temperature spikes after an excessive gaming session or long video recording. So unless your phone’s hardware cools down, you will continue to see a camera failed error on your phone. Avoid using your phone for some time to let it bring down the temperature.
8. Check Storage
When your phone is running low on storage, the Camera app might throw an error, especially when you want to take a quick photo or a video clip. And you’ll continue to face errors when the app can’t save those images or videos. Follow the steps below to check the remaining storage on your phone. Step 1: Open Settings and go to Battery and device care. Step 2: Select Storage from the following menu. Step 3: Check internal storage usage.
If you have a micro-SD card slot on your phone, you can move large media files to it and free up storage. Alternatively, you can delete irrelevant media files or upload photos and videos to Google Photos or OneDrive.
9. Update One UI
A laggy camera interface or camera failed error might be due to a buggy Android build on your Galaxy phone. Lately, Samsung has improved its software update game. Also, monthly security patches arrive regularly. We recommend installing all the latest security patches and pending updates, if any. Head to the Settings and open the software update menu. Install the latest One UI update. Reboot your phone to let it apply all the changes, and then try using the Camera app again.
Get Back Working Camera on Galaxy Phones
The camera is a core part of any smartphone experience to capture photos and videos as memories or sharing on social media. When the camera app is not working, that can leave you in a soup. Thankfully, you can use the solutions mentioned above to fix the usual camera failed errors on Galaxy phones.