Suppose restarting your PC or reconnecting the audio device hasn’t yielded any good, then the issue might lie with your web browser or audio drivers on Windows. You can go through the solutions listed below to fix YouTube’s audio renderer error on Windows.
1. Clear Browsing Data
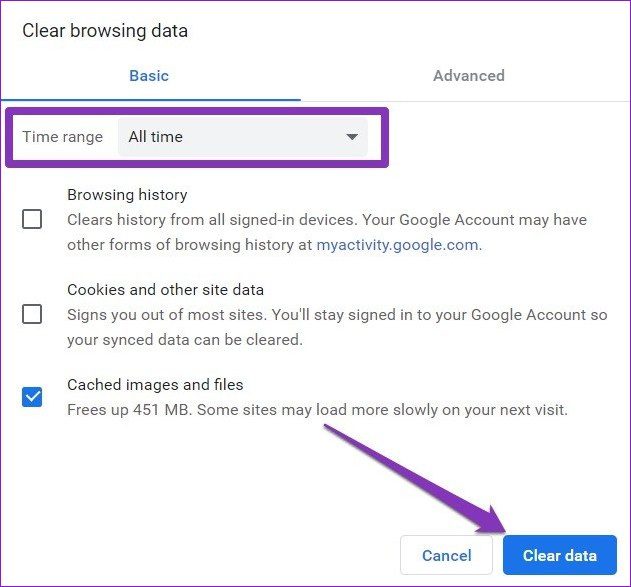
Corrupted cache data is one of the most common causes behind such YouTube playback errors. Hence, clearing that cache data should be your first course of action. To clear browsing data on Chrome, press Ctrl + Shift + Delete to open the Clear browsing data panel. Use the drop-down menu next to the Time range to select All time. Mark the box that reads ‘Cached images and files’ and hit Clear data.
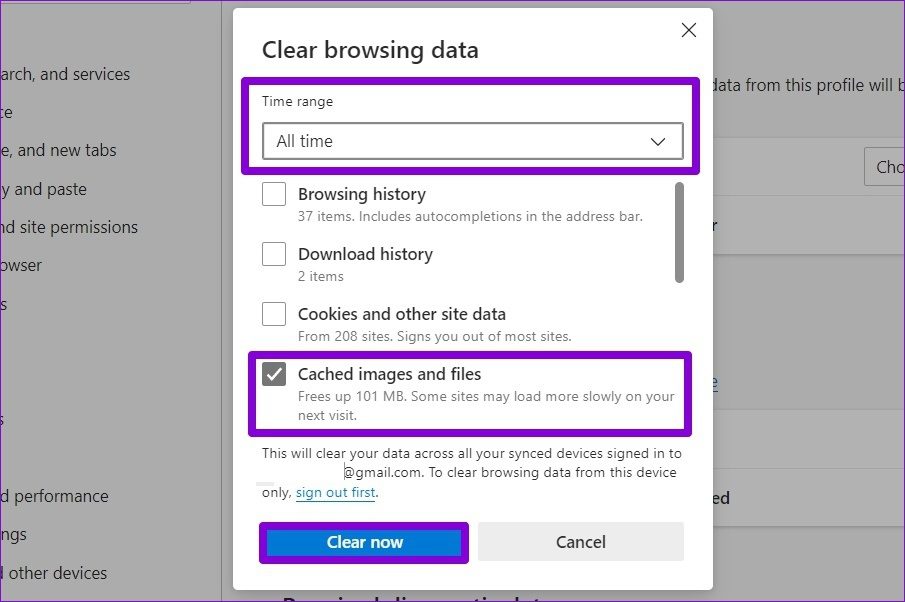
Likewise, if you’re on Edge, press Ctrl + Shift + Delete to open the Clear browsing data panel. Select All time and mark the box that reads ‘Cached images and files’. Then hit Clear data.
2. Disable Hardware Acceleration
Next, if you’ve enabled hardware acceleration on your browser to aid its performance while playing videos, such YouTube errors may occur. Try disabling the hardware acceleration on your browser to rule this out to see if that helps.
Disable Hardware Acceleration on Chrome
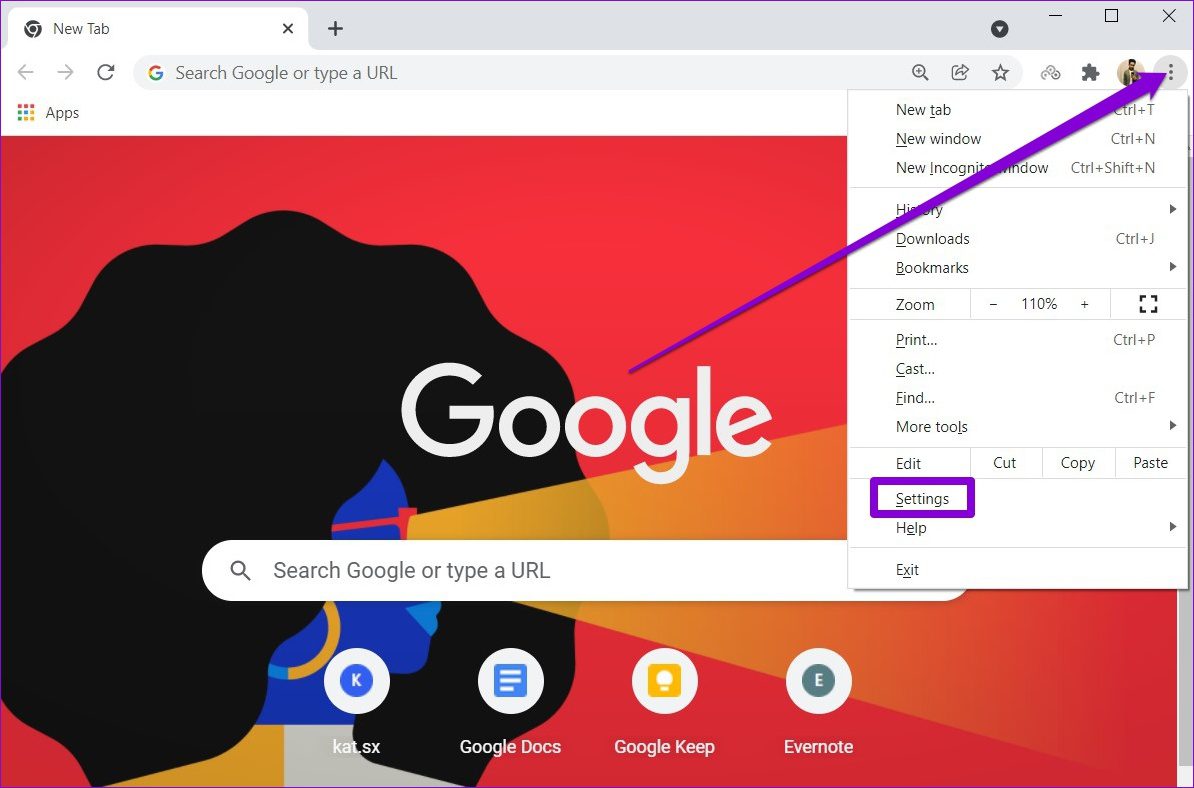
Step 1: Launch Google Chrome on your PC. Click on the three-dot menu icon in the top-right corner to open Settings.
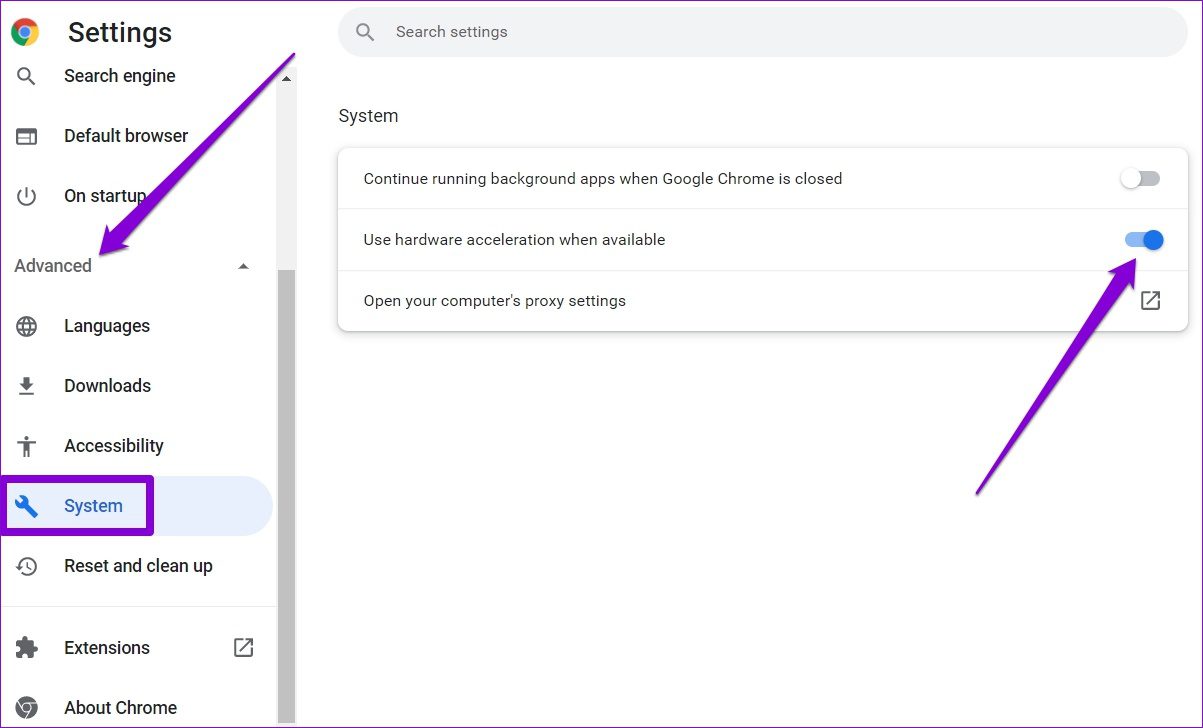
Step 2: Use the left pane to expand the Advanced section and navigate to the System tab. Then turn off the switch next to ‘Use hardware acceleration when available.’
Disable Hardware Acceleration on Edge
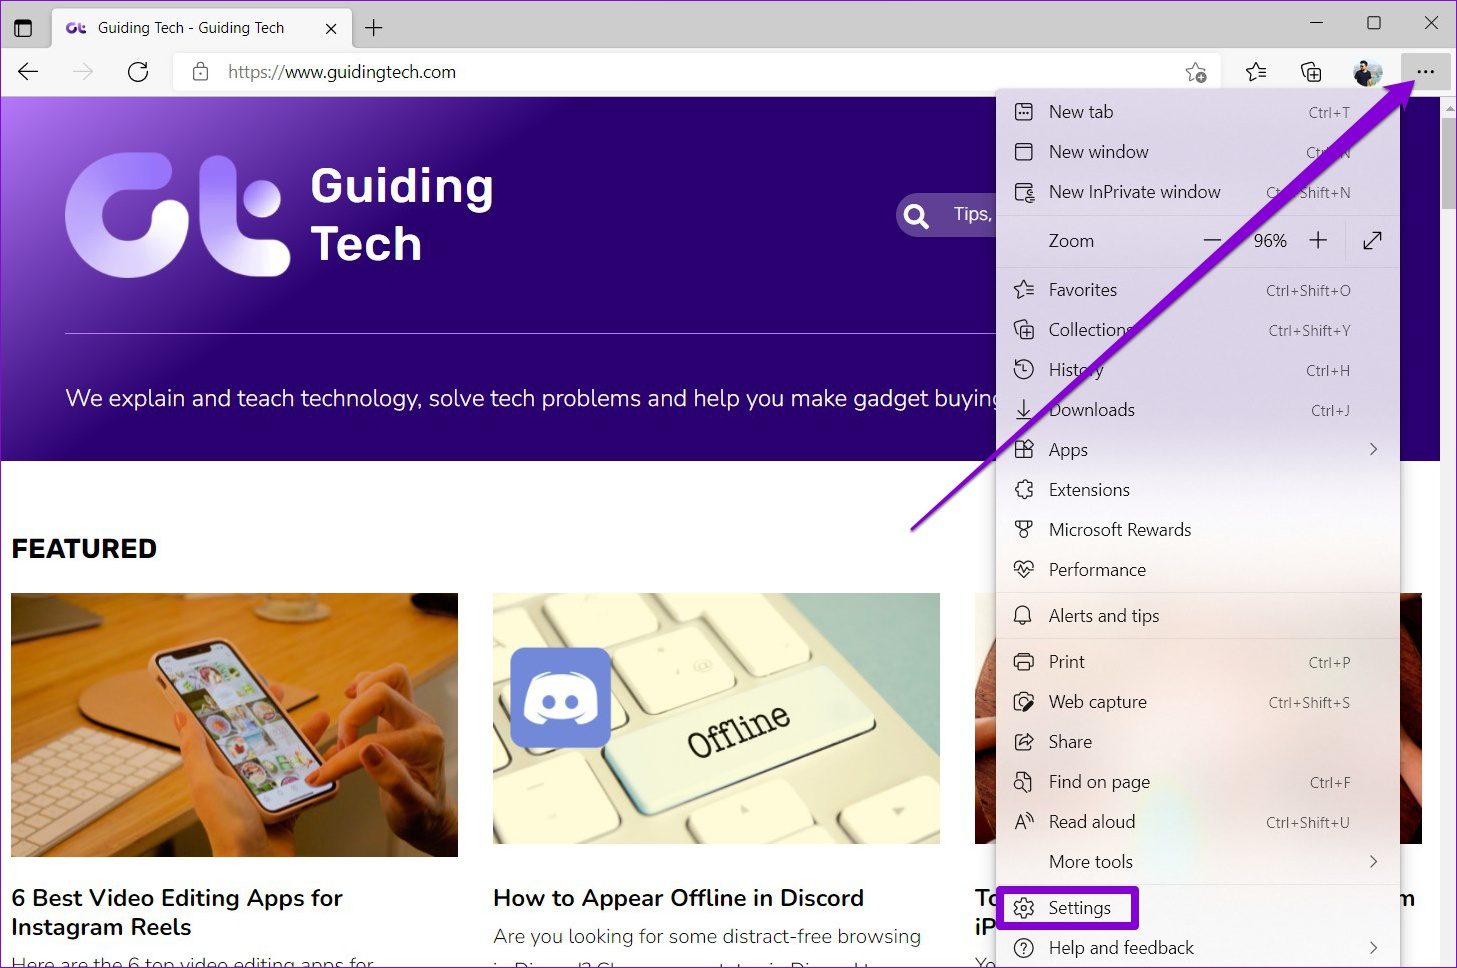
Step 1: Launch a site in Microsoft Edge. Then, click the three-dot menu icon in the top-right corner to open Settings.
Step 2: Head over to the System and performance tab on your left. Then toggle off the switch next to ‘Use hardware acceleration when available.’
3. Run Audio Troubleshooter
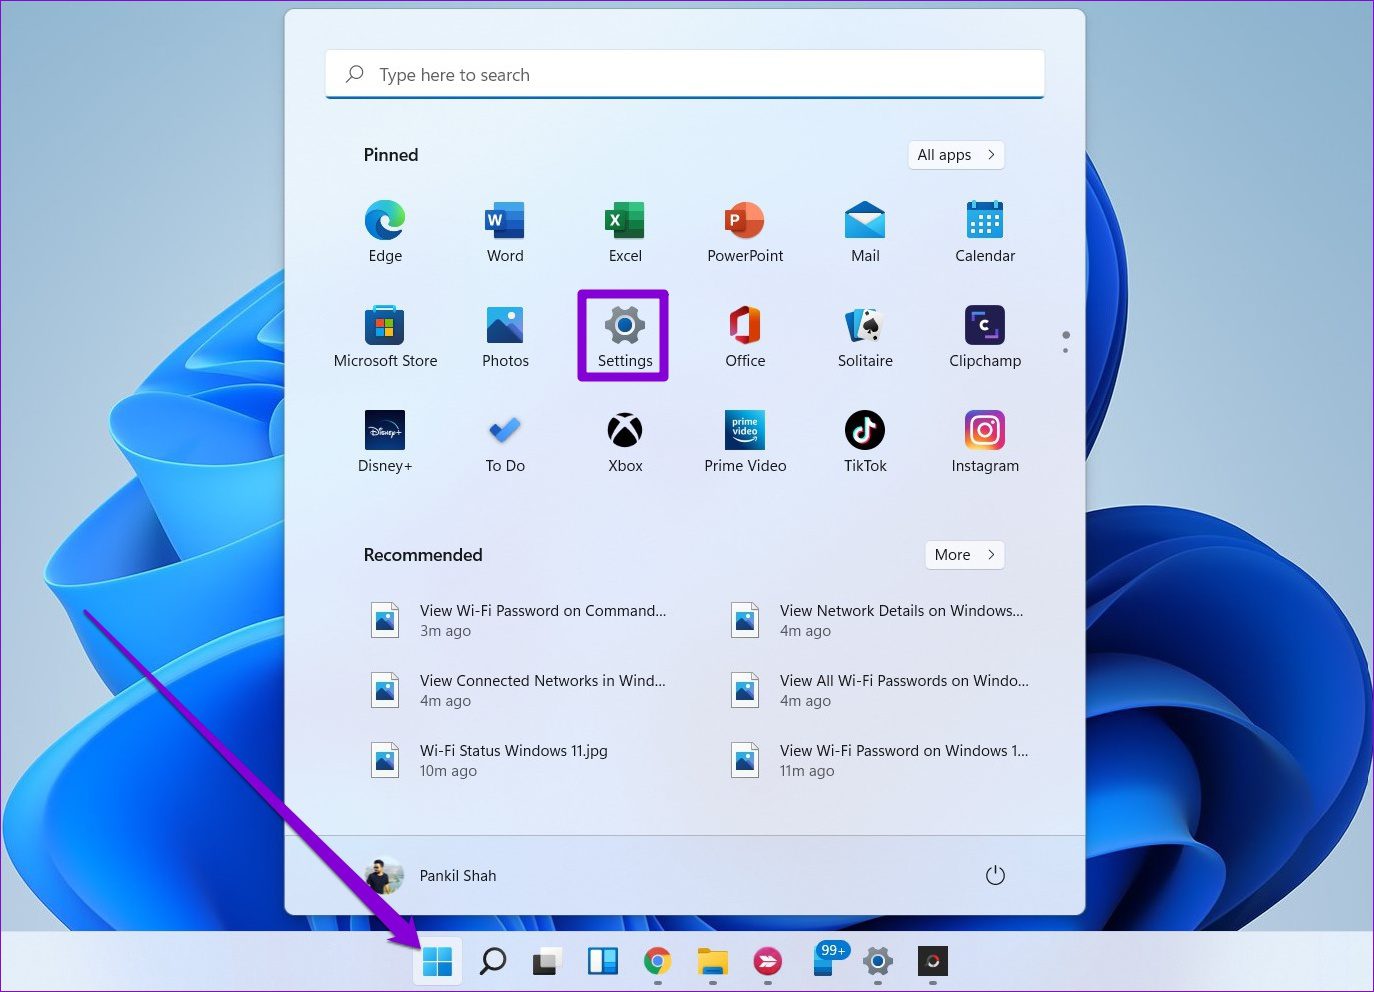
If the error persists, then it’s possible that the issue is at the system level and has nothing to do with your browser. To fix this, you can take advantage of the built-in audio troubleshooter on Windows to let it detect and fix any audio issues for you. Step 1: Open the Start menu and click on the gear icon to launch the Settings app.
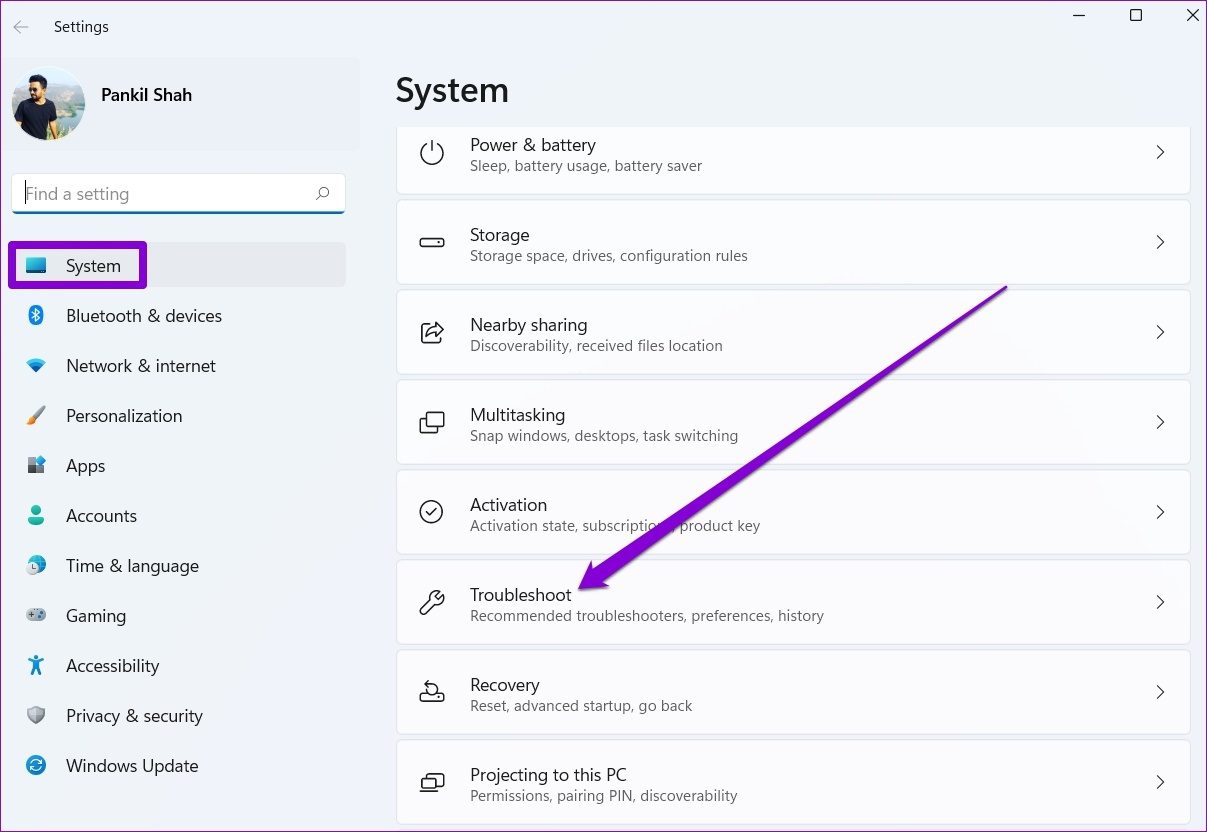
Step 2: Navigate to the System tab. Then select Troubleshoot.
Step 3: Go to Other troubleshooters.
Step 4: Click on the Run button next to Playing audio to initiate the troubleshooting process.
4. Disable and Enable Audio Device
If the troubleshooter can’t seem to detect any issues, then you can try disabling the audio device and enabling it again. Oddly enough, several users were able to get past YouTube’s audio renderer error by merely re-enabling the audio device. Step 1: Press Windows key + X and select Device Manager from the list that pops open on the Taskbar.
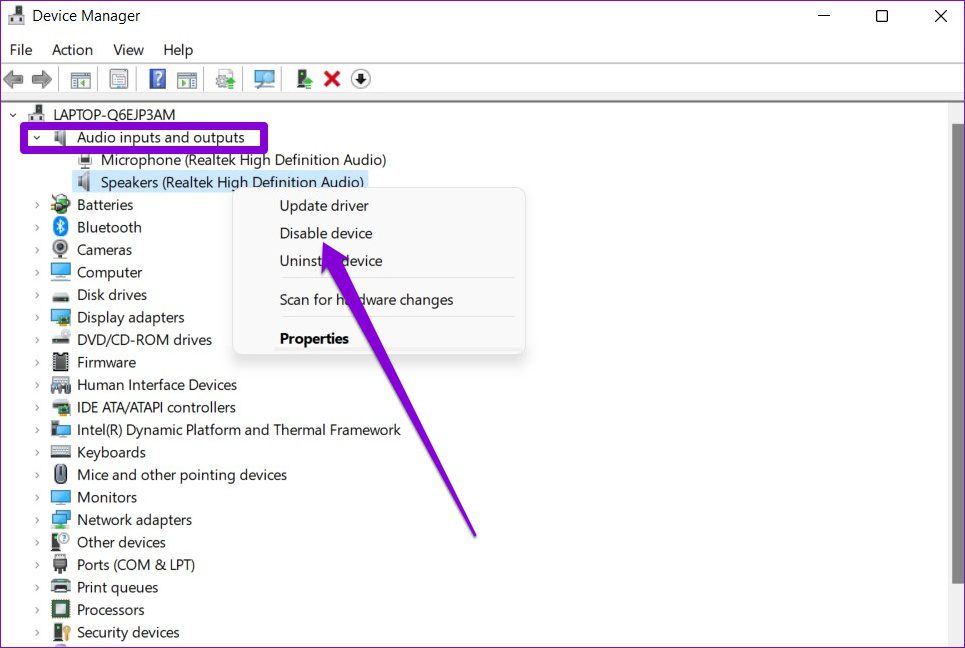
Step 2: Click on the arrow before Audio inputs and outputs to expand it. Then, right-click on your audio device and select Disable device.
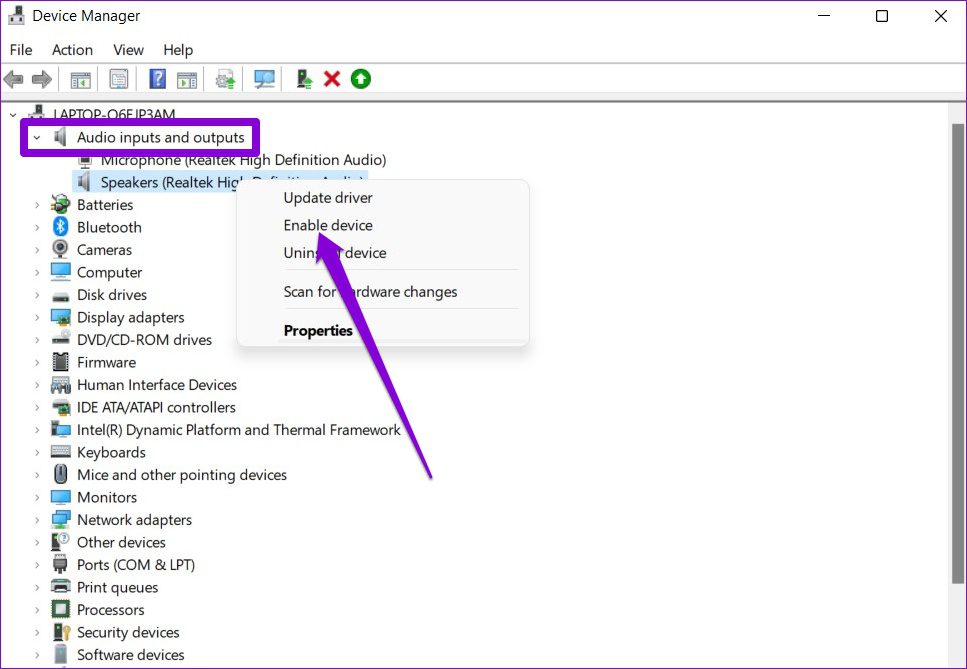
Step 3: Right-click on the same audio device and select Enable device. It’d help if your PC is connected to the Internet so that it can fetch driver updates for the audio device, if any.
5. Update or Reinstall Audio Drivers
Problems with the audio drivers installed on your PC might cause YouTube’s audio renderer error on Windows. Thankfully, you can fix most issues by updating the audio drivers. Here’s how to do it. Step 1: Press Windows key + S to open Windows Search, type in device manager, and press Enter.
Step 2: Click on the arrow before ‘Sound, video, and game controllers’ to expand that section. Right-click on your audio adapter and select Update driver.
If updating the driver doesn’t work, follow the steps mentioned above to uninstall the audio driver. After that, restart your PC and let Windows install the removed audio drivers automatically.
6. Tweak Audio Playback Settings
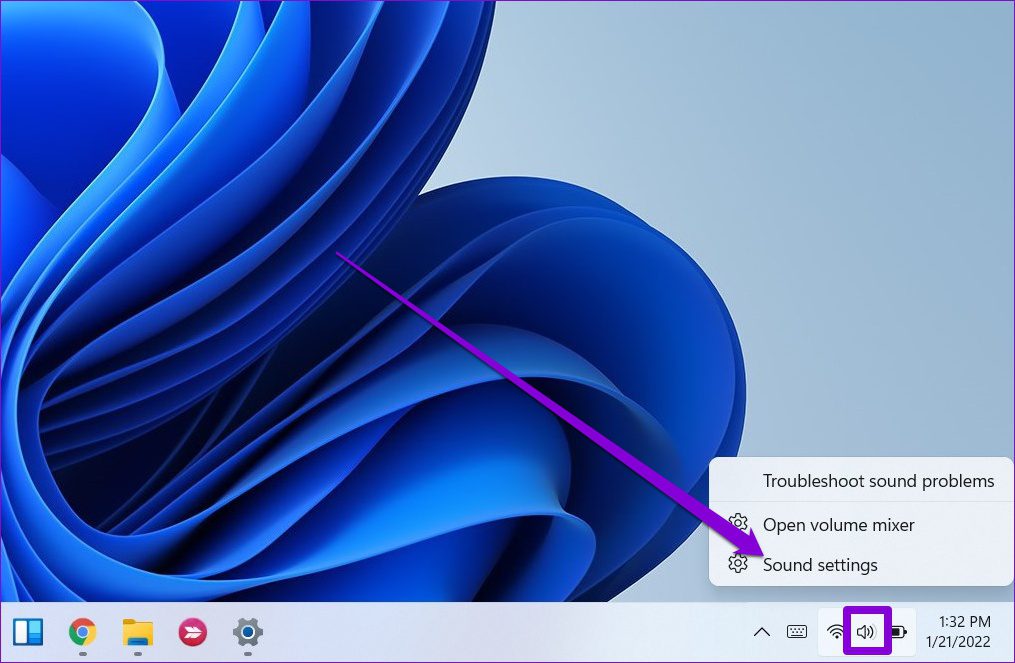
If your PC has an audio mixing or enhancement program, then such errors may occur. You can modify the audio playback settings on Windows to prevent apps from making changes to your audio device to fix them. Here’s how. Step 1: Right-click on the speaker icon on the Taskbar and select Sound settings.
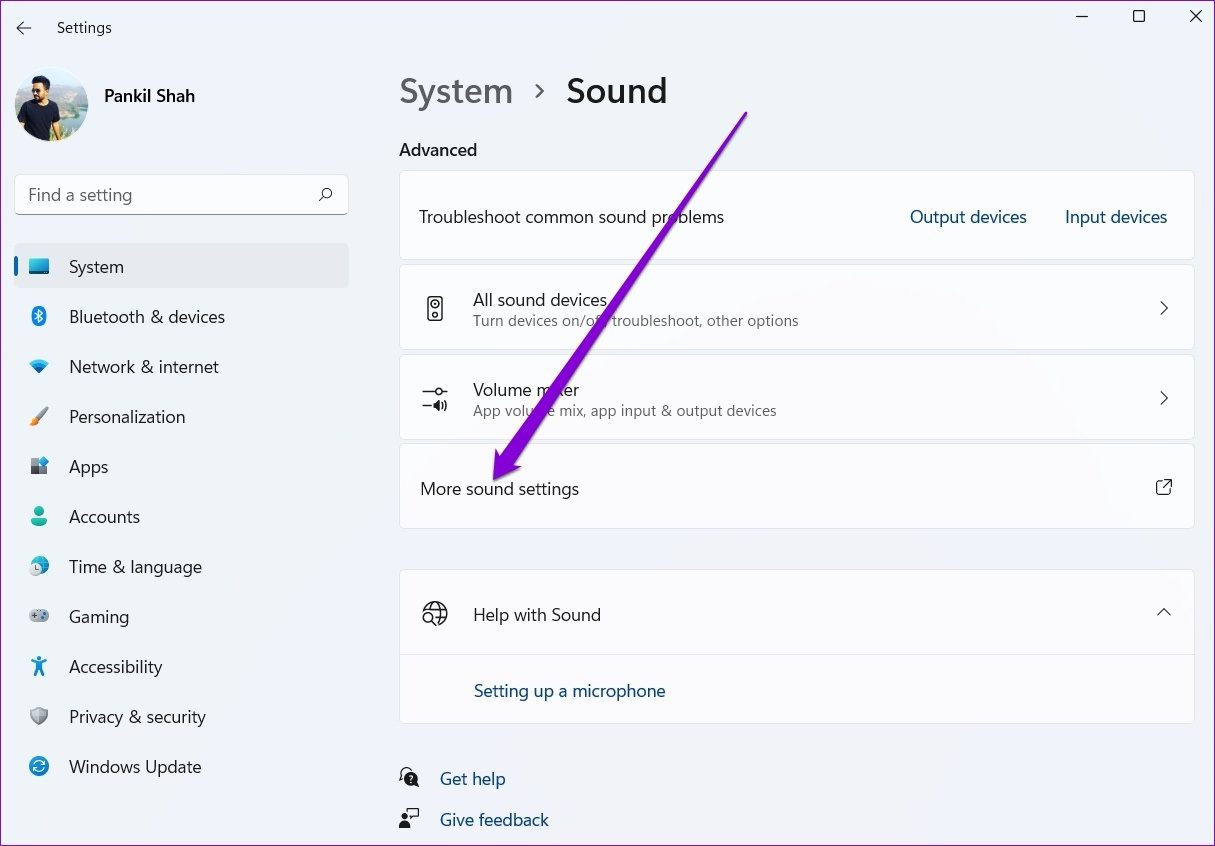
Step 2: Scroll down to the Advanced section. Click on More sound settings and that’ll open Sound settings a new window.
Step 3: Right-click on your audio device and select Properties.
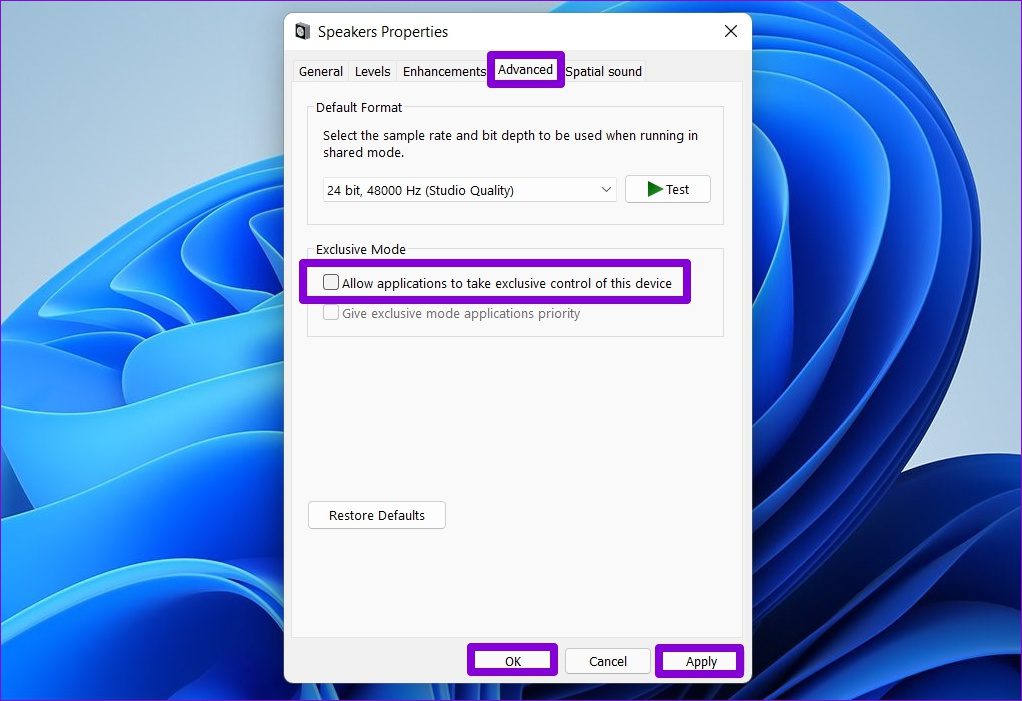
Step 4: Under the Advanced tab, uncheck the box that reads ‘Allow applications to take exclusive control of this device, hit Apply followed by OK.
Restart your PC and try playing the YouTube video again.
Fixing Audio Woes
While such audio issues with YouTube are nothing new, the audio renderer error is limited to Windows. Hopefully, one of the above fixes works for you to get back to entertaining yourself with the YouTube videos again.
