It’s a pretty straightforward process after which you won’t be able to access Siri via your AirPods. We will demonstrate the process using both an iPhone and a Mac so you can perform the steps based on the device you use. But before you turn off Siri, let’s find out what Siri can help you with.
What Can Siri Do on AirPods
Siri on AirPods can be useful for a number of reasons. Firstly, you don’t have to reach out to your phone to trigger it which makes it convenient. Thereafter, you can start giving voice commands to Siri to perform actions straight via the AirPods. For example, you can ask Siri to make a call or send a text to someone. You can also ask for news or weather alerts and they will be played directly in your ears. While some may find this extremely helpful and convenient, others may find it annoying, especially when triggered accidentally. Furthermore, there’s also the privacy angle where the mic remains on all the time and listens to your conversations. This is why it’s a good idea to turn off Siri on your AirPods if you don’t use it often.
How to Disable Siri on Your AirPods Using iPhone or iPad
You can choose to disable Siri on AirPods either using an iPhone/iPad or a Mac. Here are the steps for both platforms.
1. Turn Off Siri on Your AirPods
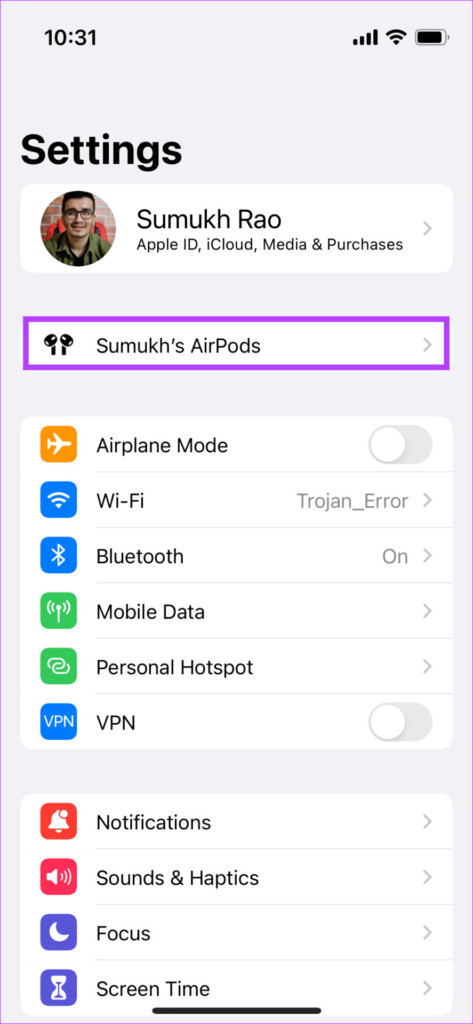
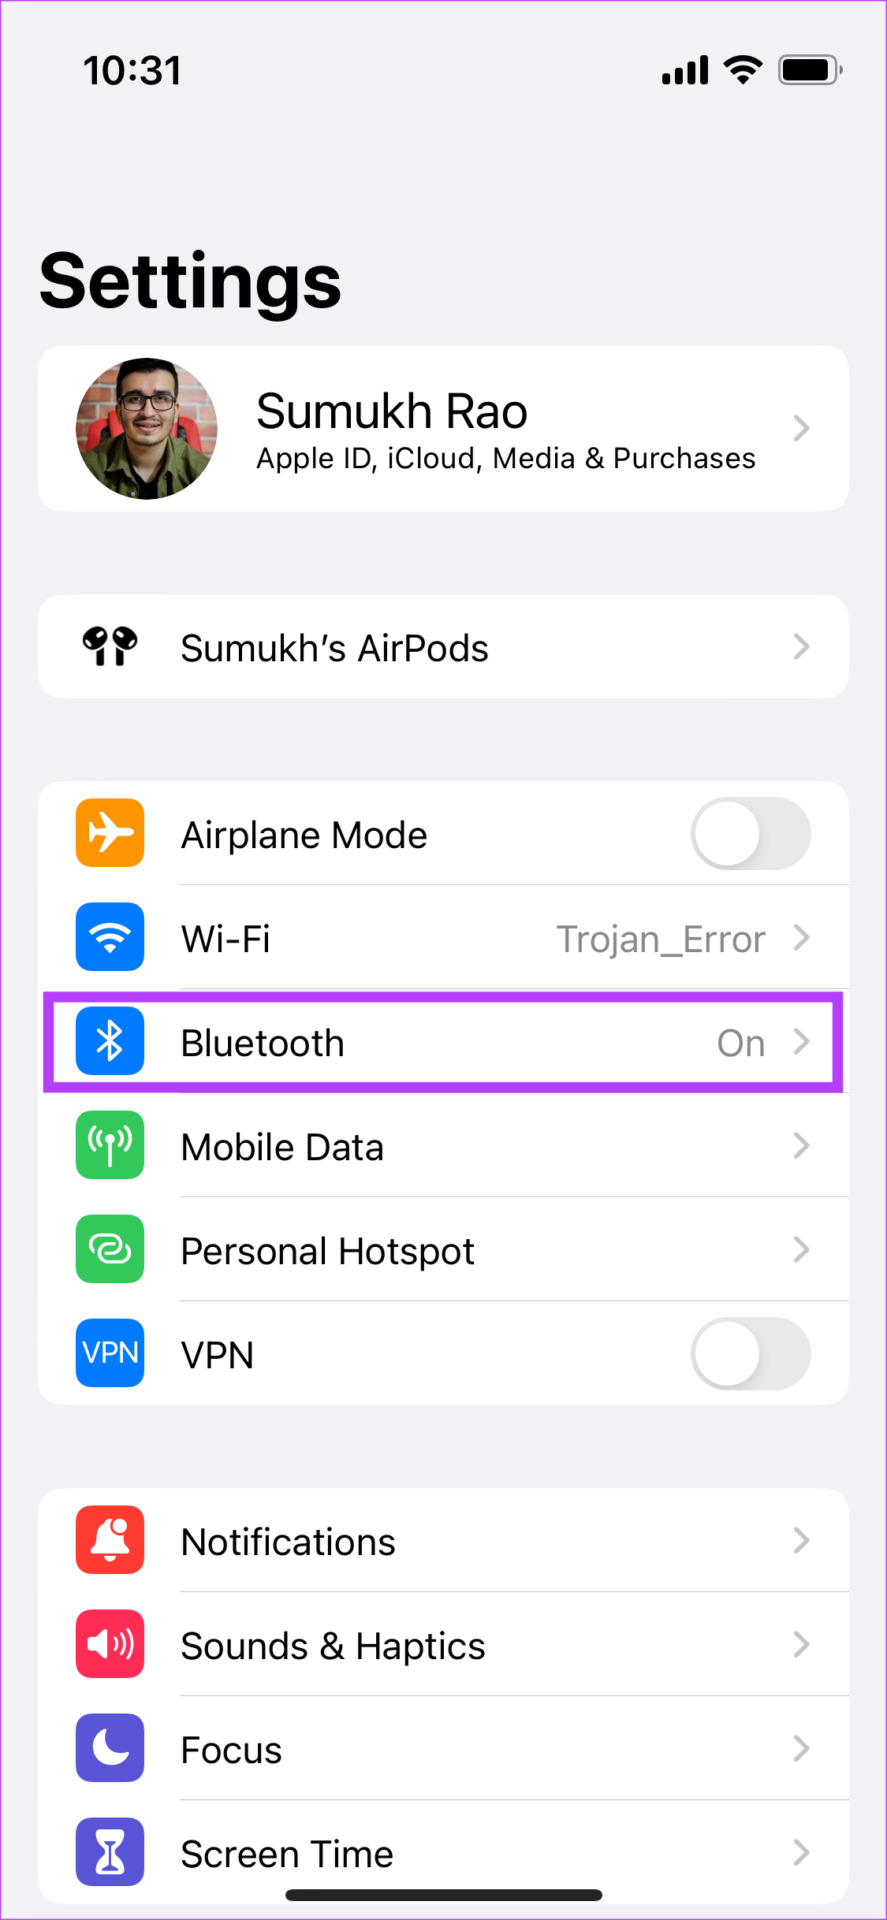
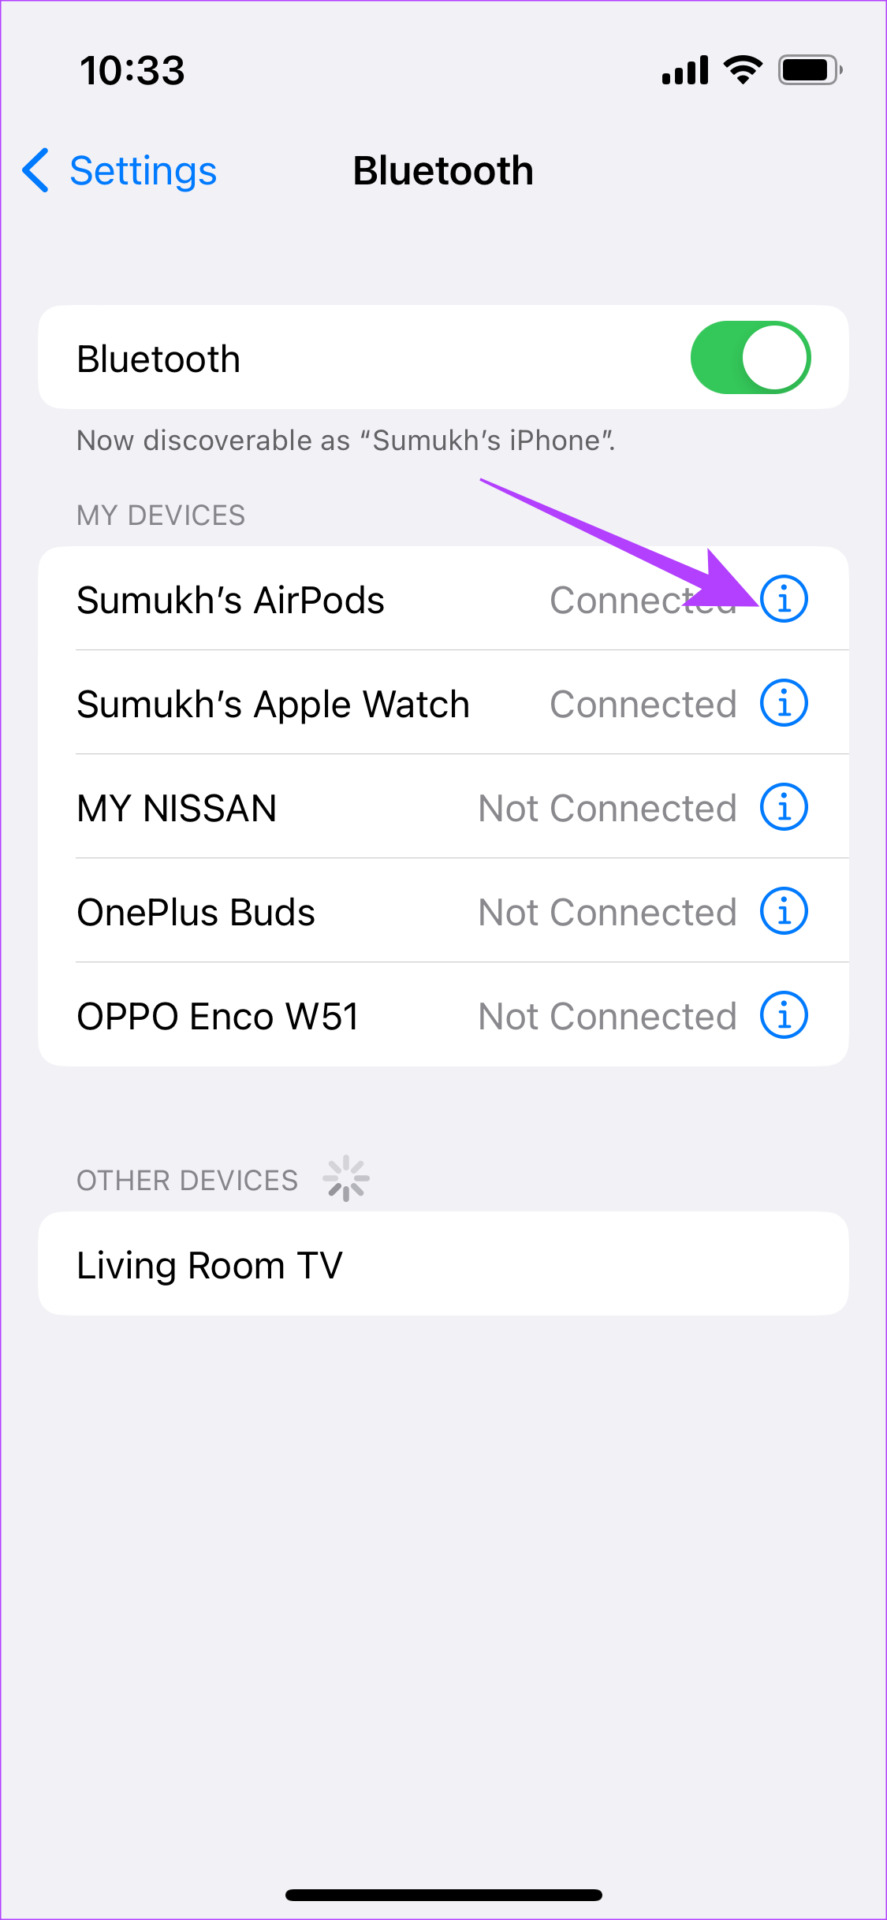
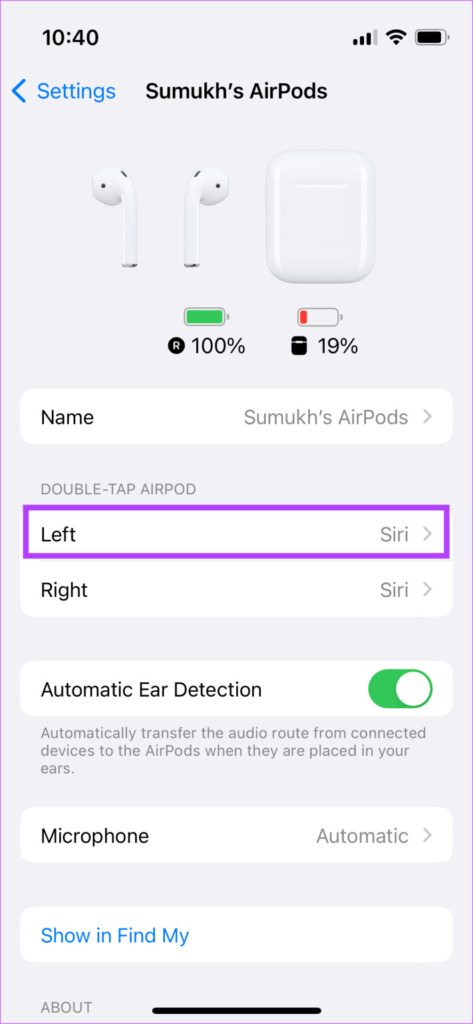
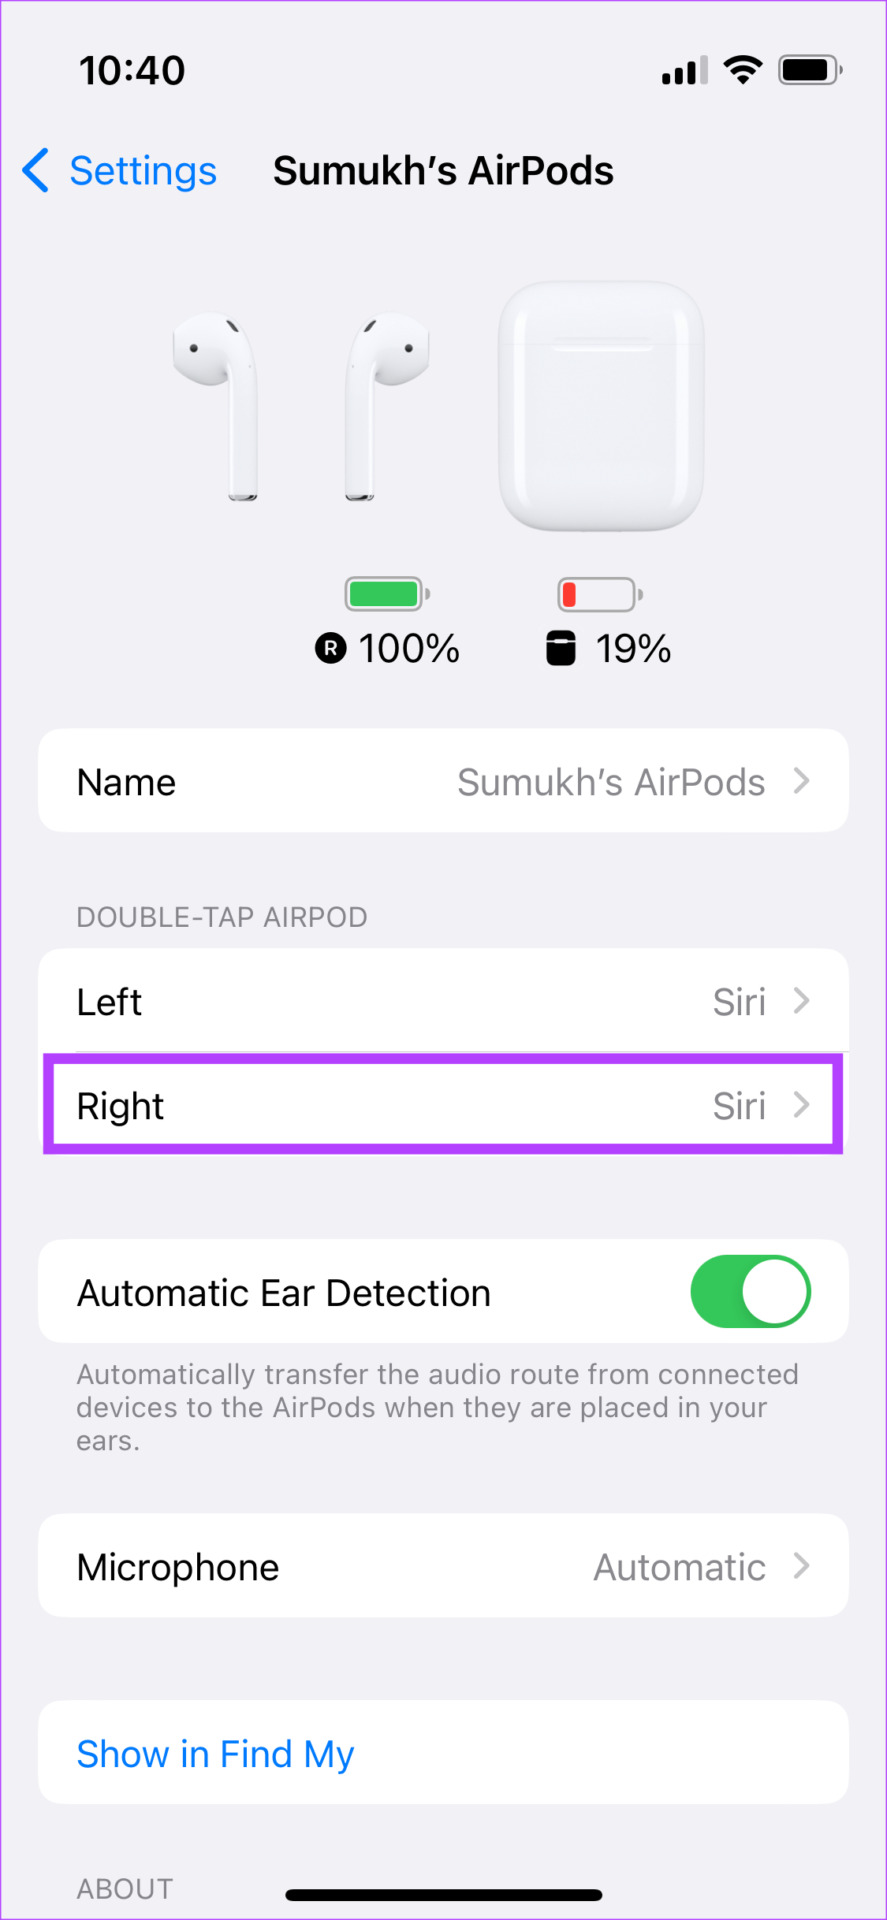
First, connect your AirPods to your iPhone or iPad. Once done, perform these steps. Step 1: Open the Settings app on your iPhone or iPad. Tap on your AirPods’ name that appears right at the top. Alternative: If you don’t see this option, head over to the Bluetooth section and tap on the ‘i’ button next to your AirPods. Step 2: Under ‘Double-tap AirPod’ or ‘Press and hold AirPods’ depending on which version of the AirPods you have, first select the Left option. Step 3: Change the setting to anything other than Siri. If you don’t want it to perform anything, select Off. Step 4: Head back to the previous menu and select Right. Do the same thing here and select any other option except for Siri. You’ve now disabled Siri on your AirPods via touch controls. However, Siri can still be triggered using your voice via the “Hey Siri” command. If you wish to disable that as well, follow along.
2. Disable Hey Siri on iPhone or iPad to Completely Turn Off Siri on AirPods
Step 1: Open the Setting app on your iPhone or iPad. Scroll down to the ‘Siri & Search’ section. Step 2: Turn off the toggle next to ‘Listen for “Hey Siri”‘. Now, your AirPods will not activate Siri even when you use the wake word.
How to Mute Siri on Your AirPods Using a Mac
If you don’t have an iPhone or an iPad, don’t worry, you can disable Siri on your AirPods using a Mac. Connect your AirPods to your Mac and follow the instructions.
1. Disable Siri on AirPods
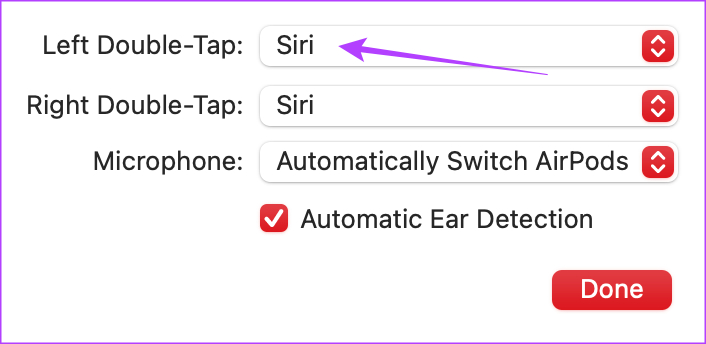
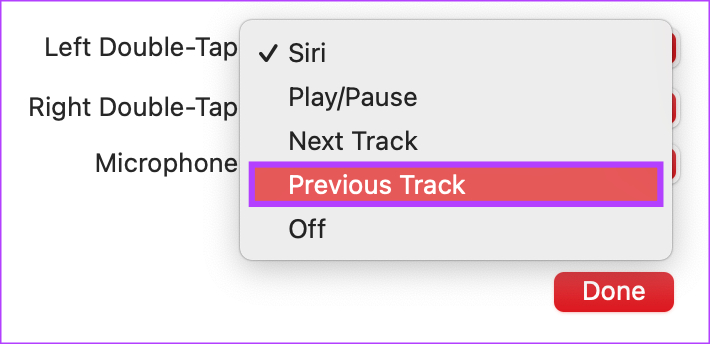
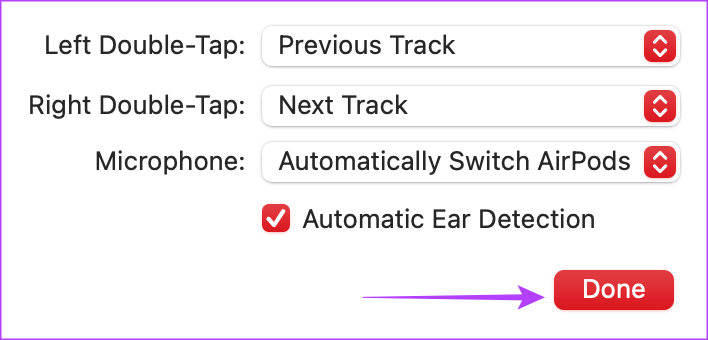
Step 1: Click on the Apple logo in the top-left corner of your Mac’s screen. Then, select System Preferences. Step 2: Navigate to the Bluetooth menu. Step 3: Find your AirPods in the Devices section. Then, click on the Options button. Step 4: First, click on the drop-down next to ‘Left Double-Tap’. Step 5: Choose a different option from Siri. Now, repeat the same for the ‘Right Double-Tap’ setting. Step 6: Once the settings are changed, click on Done. You can no longer activate Siri via your AirPods. However, Siri will still get triggered if you use the “Hey Siri” wake word. Here’s how to turn that off.
2. Turn off Hey Siri on Mac
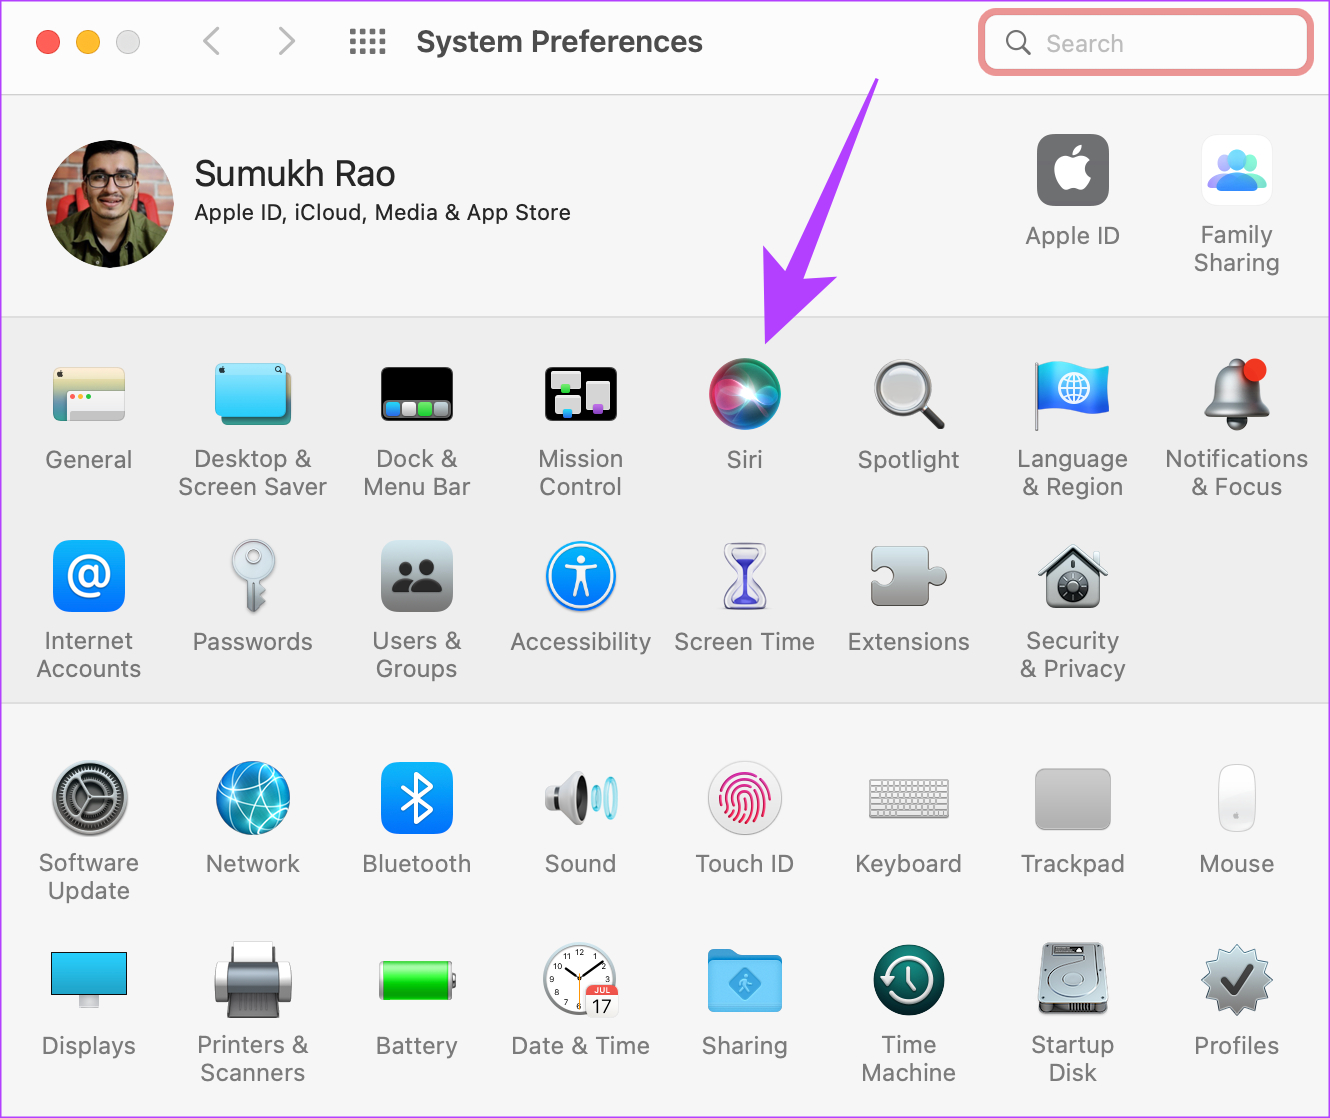
Step 1: Click on the Apple logo in the top-left corner of your Mac’s screen. Then, select System Preferences. Step 2: Navigate to the Siri section. Step 3: Untick the checkbox next to “Listen for “Hey Siri”‘. That’s it! Siri won’t bother you anymore while using your AirPods. Besides, you can enable Siri anytime you want following the process elaborated in the next section.
How to Re-activate Siri on Your AirPods
If you feel like you miss Siri and want to use it to perform tasks using your voice, you can enable it using the same steps that you use to disable the option.
Enable Siri on Your AirPods Using an iPhone or iPad
First, connect your AirPods to your iPhone or iPad. Then, perform these steps. Step 1: Open the Settings app on your iPhone or iPad. Tap on your AirPods’ name that appears right at the top. If you don’t see this option, head over to the Bluetooth section and tap on the ‘i’ button next to your AirPods. Step 2: Under ‘Double-tap AirPod’ or ‘Press and hold AirPods’ depending on which version of the AirPods you have, select either the Left or the Right earbud. Step 3: Tap on Siri to enable it. Now, every time you perform that action with the respective earbud, Siri will be triggered. Step 4: If you want to use Siri hands-free, head over to the Settings app and then to the ‘Siri & Search’ section. Step 5: Turn on the toggle next to ‘Listen for “Hey Siri”‘.
Activate Siri on Your AirPods Using a Mac
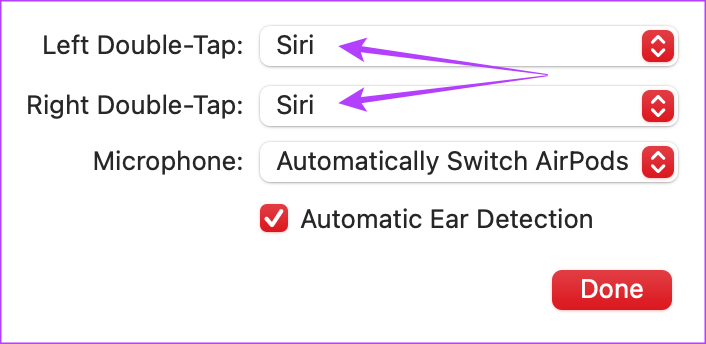
First, connect your AirPods to your Mac. Then, perform these steps. Step 1: Click on the Apple logo in the top-left corner and select System Preferences. Step 2: Navigate to the Bluetooth menu. Step 3: Find your AirPods in the Devices section. Then, click on the Options button. Step 4: Choose either the ‘Left Double-Tap’ or ‘Right Double-Tap’ option. Select Siri. Now, every time you perform that action with the respective earbud, Siri will be triggered. Step 5: If you want to use Siri hands-free, head back to System Preferences and navigate to the Siri section. Step 6: Tick the checkbox next to “Listen for “Hey Siri”‘. Enjoy using Siri once again!
Keep Siri at Bay
To some, Siri might be the best feature on the AirPods. To others, it might just be a mere annoyance. If you belong to the latter category, you can turn off Siri on your AirPods and enjoy an interrupted audio experience. Say goodbye to accidental triggers!

