There might be several reasons for slow transfer speeds and you’ll need to roll up sleeves to troubleshoot a few things. Here are the best ways to fix slow USB transfer speeds on your Mac to avoid getting stuck in such a situation.
1. Clean the USB Port
Consider cleaning the USB Port of your Mac which is prone to collecting dirt and debris after prolonged usage. You can use a microfiber cloth hoisted with a toothpick to clean the port. Avoid using cotton buds or just toothpicks since they can leave lint behind. Such cleaning can be part of your maintenance activities to extend your Mac lifespan.
2. Switch to a USB 3.0 Dongle
If you are using a USB 3.0 Flash Drive but your Mac lacks a USB 3.0 port, you can use a USB Hub with USB 3.0 ports to speed up the file transfer process. You can get transfer speeds up to 30Gbps with USB 3.0. That is way more than USB 2.0, which is limited to 480Mbps transfer speeds. Moving large files like videos or a clip rendered in Ultra HD resolution for uploading on social media can benefit from such speeds.
3. Restart Your Mac
A mere restart can solve many problems related to your Mac’s operating system. That is worth a try if you still face slow USB transfer speeds. Step 1: Click the Apple icon in the top-left corner.
Step 2: Select Restart from the list of options.
After your Mac restarts, try connecting your USB Drive to check if the problem is solved.
4. Disable Spotlight Indexing for Your USB Drive
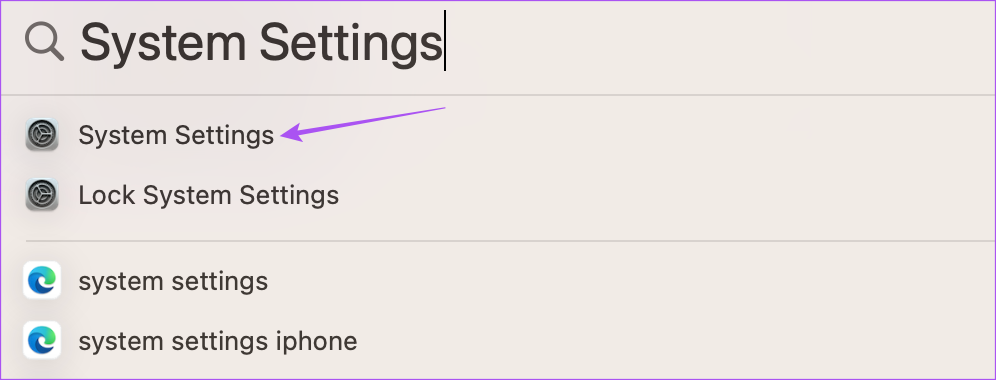
Whenever you connect your USB Drive to your Mac, Spotlight on your Mac will read the storage device to display all its information in an organized manner. Sometimes this process can get delayed on your Mac, resulting in slower transfer speeds. Here’s how you can try disabling Spotlight for your USB Drive. Ensure that your USB Drive is connected to your Mac. Step 1: Press Command + Spacebar to open Spotlight Search, type System Settings, and press Return.
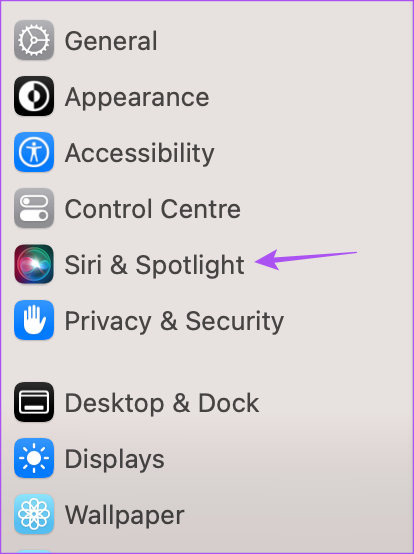
Step 2: Click on Siri And Spotlight from the left menu.
Step 3: Scroll down and click on Spotlight Privacy.
Step 4: Click the Plus icon in the pop-up window that appears on your screen.
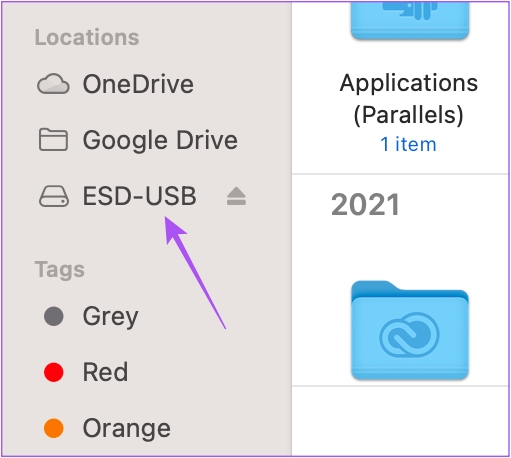
Step 5: Click on your USB Drive name from the left menu in the Finder window.
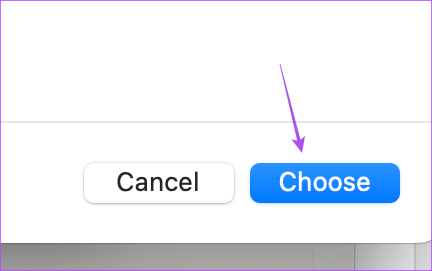
Step 6: Click on Choose at the bottom-right corner to confirm.
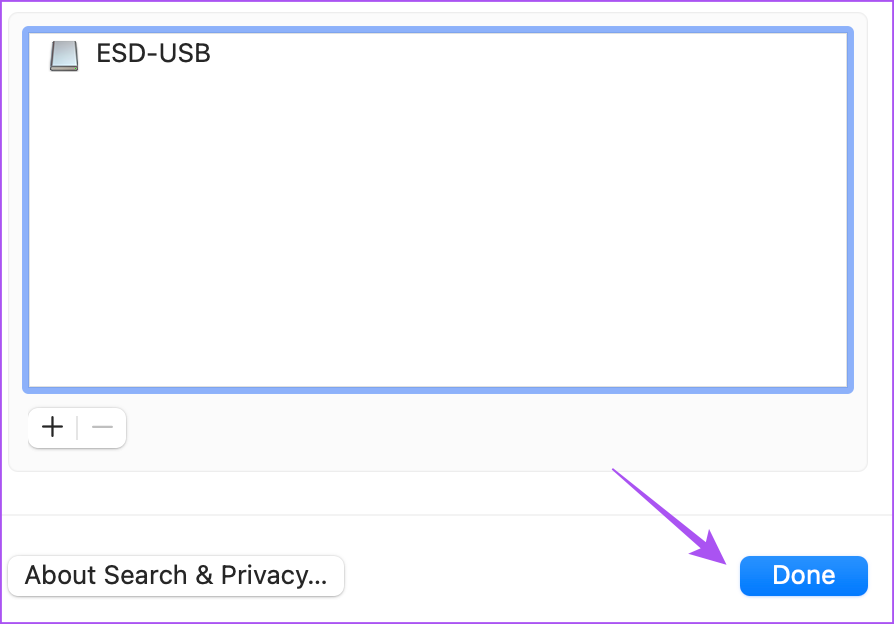
Step 7: Click on Done at the bottom-right corner to add the drive.
Step 8: Close the window and connect your USB drive to check if the problem is solved.
5. Format USB Drive to AFPS
If you are still experiencing slow USB transfer speeds, you’ll need to check and format its file system. If your USB Drive runs on the FAT32 file format, we suggest formatting it to AFPS or Apple File System format, as it works best for Macs and iMacs. But do note that you need to have a backup of your data before starting the format process. After that, check our post to format your USB drive on Mac. Use this method only if you transfer files between Mac devices.
6. Delete Finder Preference Files
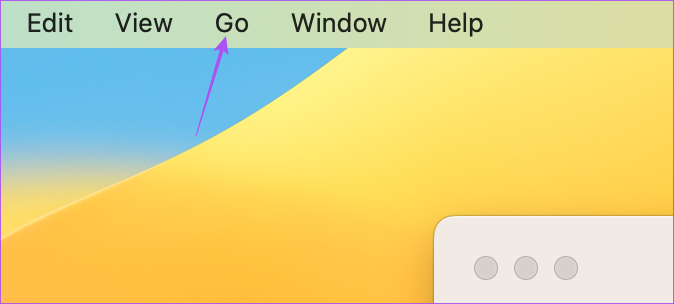
The Finder app lets you access all the data of your USB drive on your Mac. But the Preference files associated with the Finder might have corrupted or broken. Here’s how you can try deleting them. Step 1: Click the Go option in the top Menu Bar.
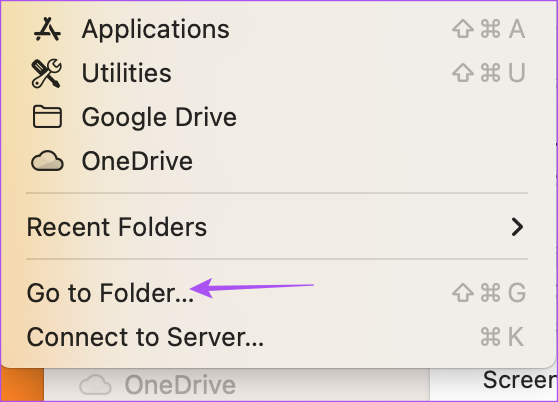
Step 2: Select Go To Folder from the list of options.
Step 3: Type /Library/Preferences in the Search window.
Step 4: Once the Preferences folder opens on your screen, click the Search icon in the top-right corner.
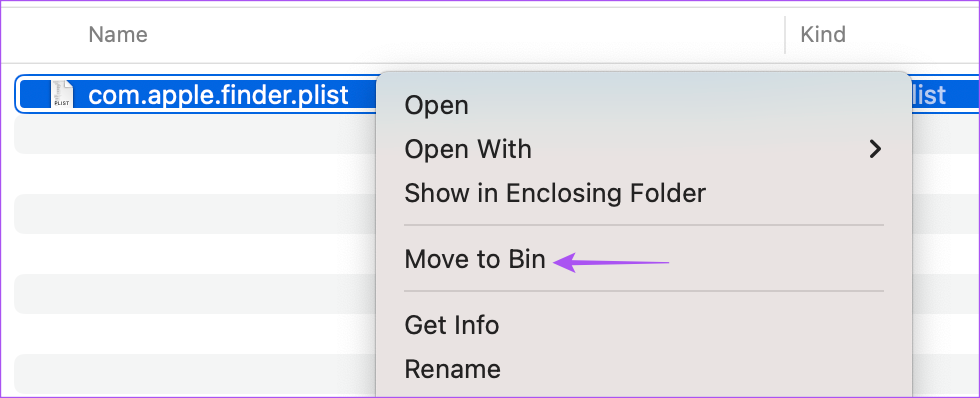
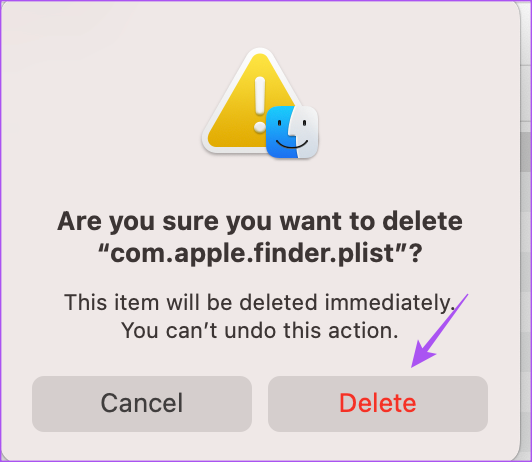
Step 5: Type apple.finder.plist in the Search Bar and press Return. Step 6: Right-click on the result and click on Move To Bin.
Step 7: Click on Delete to confirm.
Step 8: Close the window and restart your Mac.
Step 9: Connect your USB Drive and check if the problem is solved.
7. Check System Report
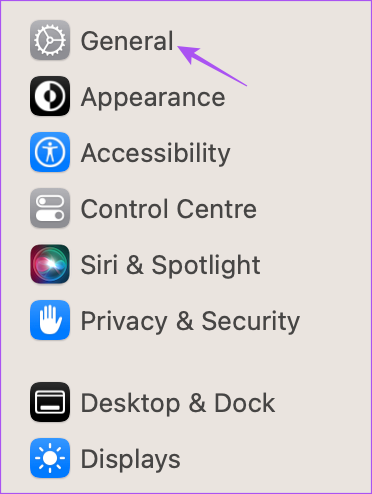
Some hardware malfunctioning with the USB port might be the issue on your Mac. Here’s how you can check the System Report to confirm. Step 1: Press Command + Spacebar to open Spotlight Search, type System Settings, and press Return.
Step 2: Click on General from the left menu.
Step 3: Click on About on the right side.
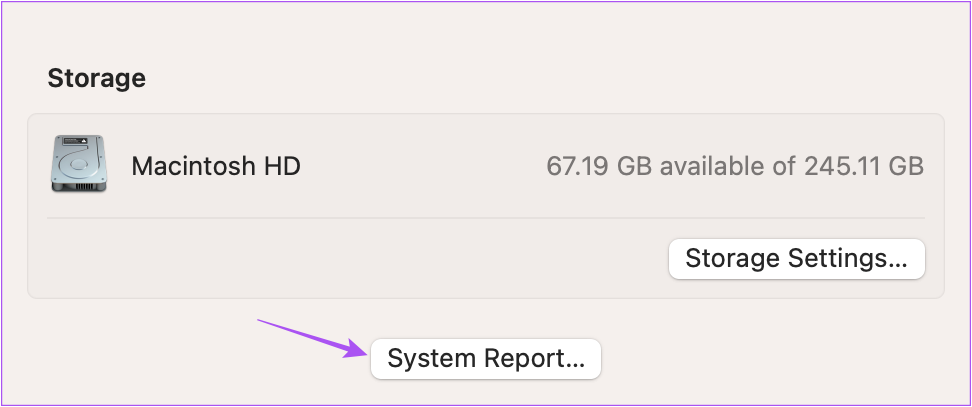
Step 4: Scroll down to the bottom and click on System Report.
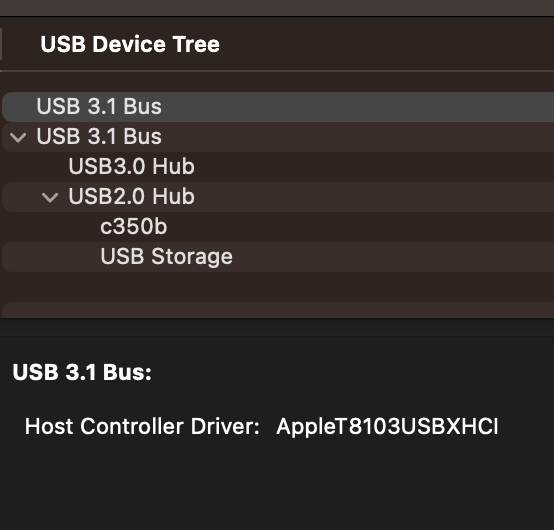
Step 5: Click on USB from the left menu in the System Report window.
Step 6: Check if the USB port information is visible.
If not, visit the nearest Apple Store to get the USB port repaired by experts.
Fast and Steady Wins the Race
These solutions will help you quickly transfer large files from USB Drive to your Mac. You can also read our post if the USB Type-C port of your Mac is not working.

![]()
![]()


![]()