If you plan to make a presentation or enjoy your Windows 11 PC on a larger screen using the Wireless display feature, you’ll need to check whether your computer supports Miracast. To help with that, we’ve compiled the best ways to check if your Windows 11 PC supports Miracast.
1. Using the Action Center
One of the quickest ways to check if your Windows 11 PC supports Miracast is through the Action Center. From the bottom-right corner of the Taskbar, click on the cluster of Network, Volume, and other icons to open the Action Center. If that doesn’t do anything, read our guide to fixing the Action Center not opening on Windows 11. When the Action Center opens, look for a tab that says Cast or Wireless Display. Click on that button.
Your PC supports Miracast if it keeps scanning for available displays. However, if your PC doesn’t support Miracast (Image on the right), you will see a message – ‘Your device doesn’t support Miracast, so you’ll need to connect an external display with a cable.’ Meanwhile, if you’re on Windows 10, you should see a ‘Project to this PC’ option under the projector menu if your PC supports Miracast.
2. Using the Settings App
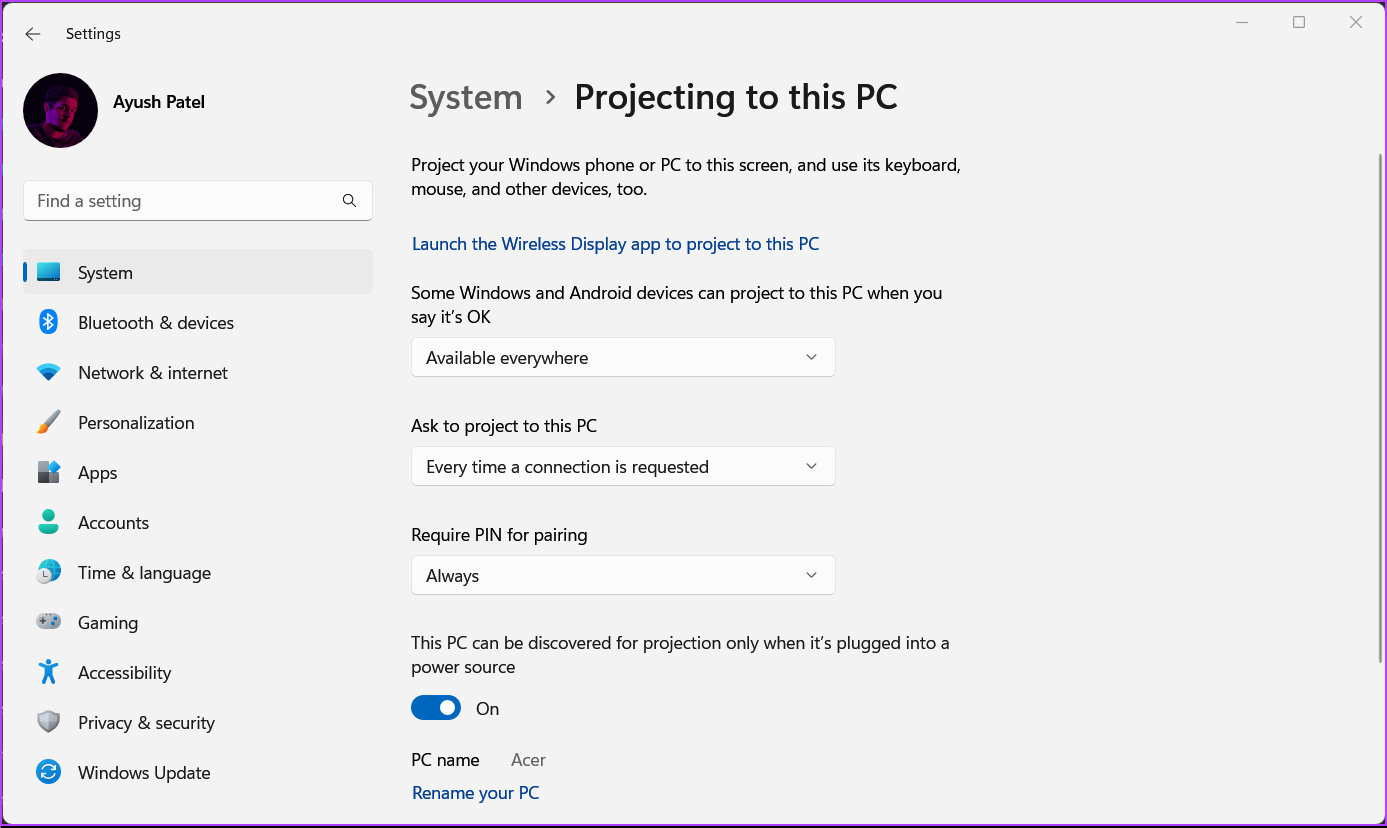
Another way to check for Miracast support is through the Settings app on Windows 11. Here’s how to use the Settings app to check for Miracast compatibility on your Windows 11 PC: Step 1: Press the Windows + I keys shortcut to open the Settings app. Step 2: Inside the Settings app, scroll down and click on ‘Projecting to this PC.’
Step 3: When you see a screen with more options to configure the wireless display feature, your PC supports Miracast. The screen will be similar to the one in the screenshot below.
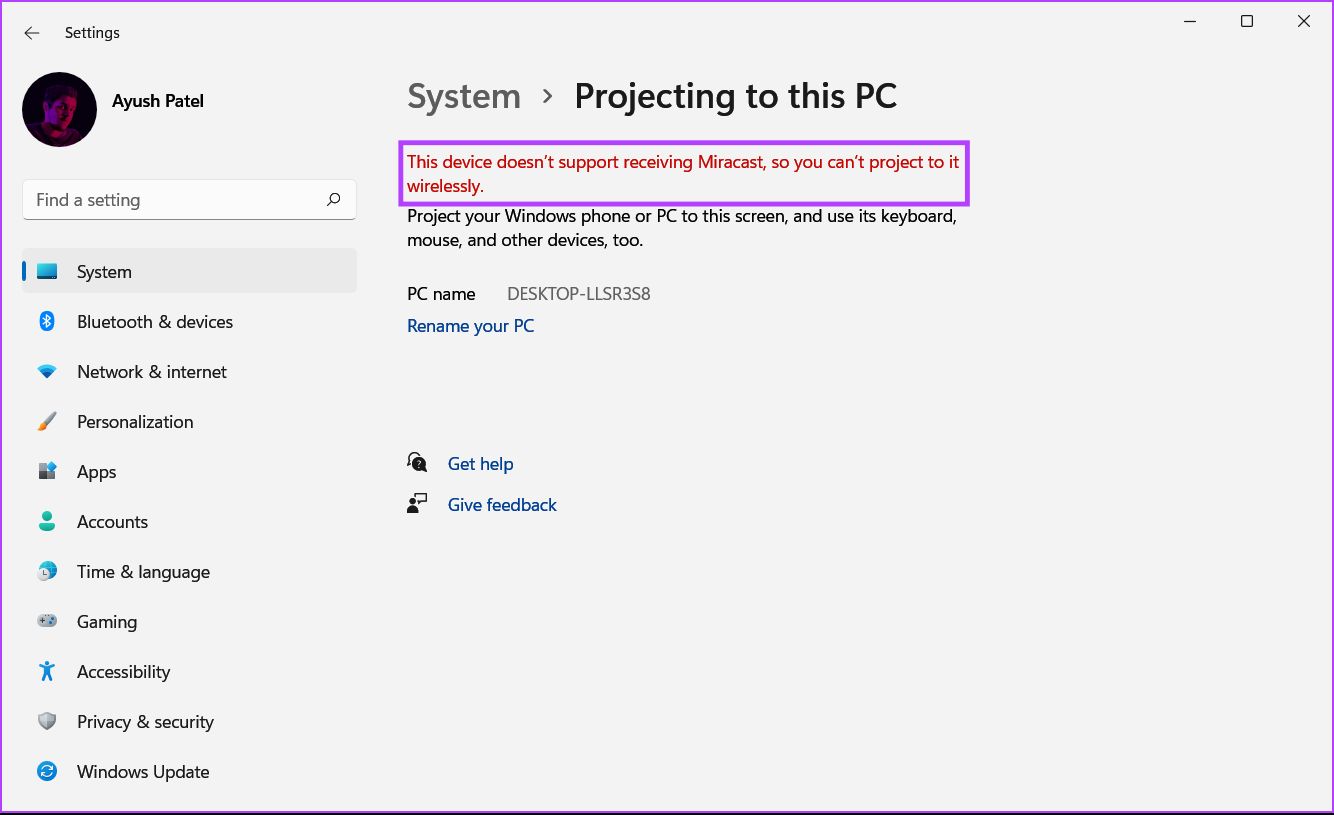
However, if your PC doesn’t support Miracast, you will see this text in red – ‘This device doesn’t support receiving Miracast, so you can’t project to it wirelessly.’
3. Using DirectX Diagnostic Tool
Windows 11 includes a DirectX Diagnostic Tool (DxDiag) to help you troubleshoot display and sound issues on your computer. You can use this tool to check whether your Windows 11 PC supports Miracast. Here’s how to use it: Step 1: Press the Windows + R keys shortcut to open a Run dialog, type dxdiag in the text field, and then hit Enter.
Step 2: In the DirectX Diagnostic Tool window, stay on the System tab, and click on the Save All Information button.
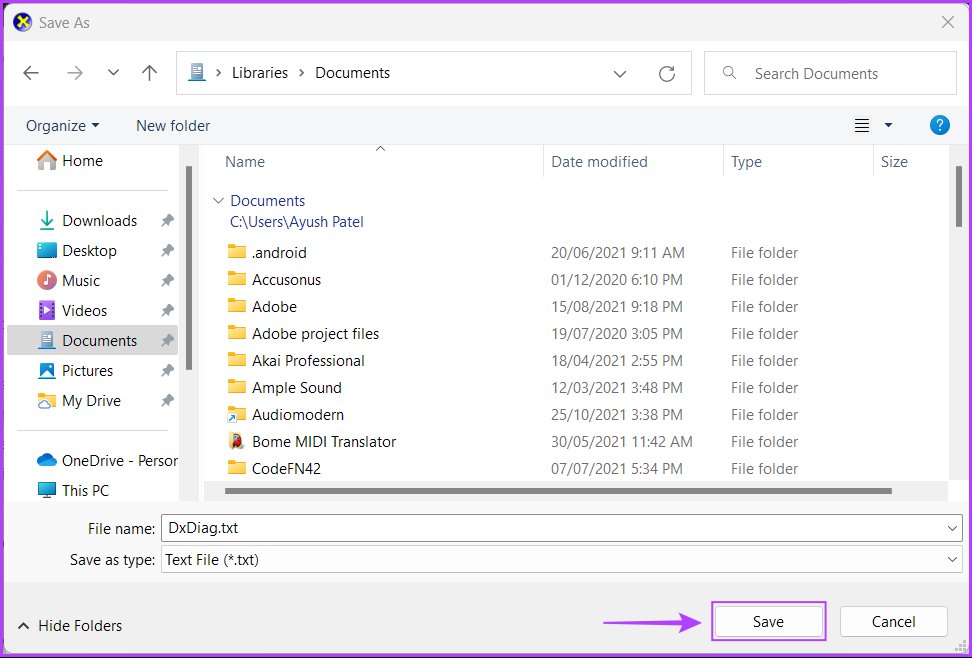
Step 3: To save the DxDiag.txt file on your system, navigate to the folder where you want to store it and click the Save button.
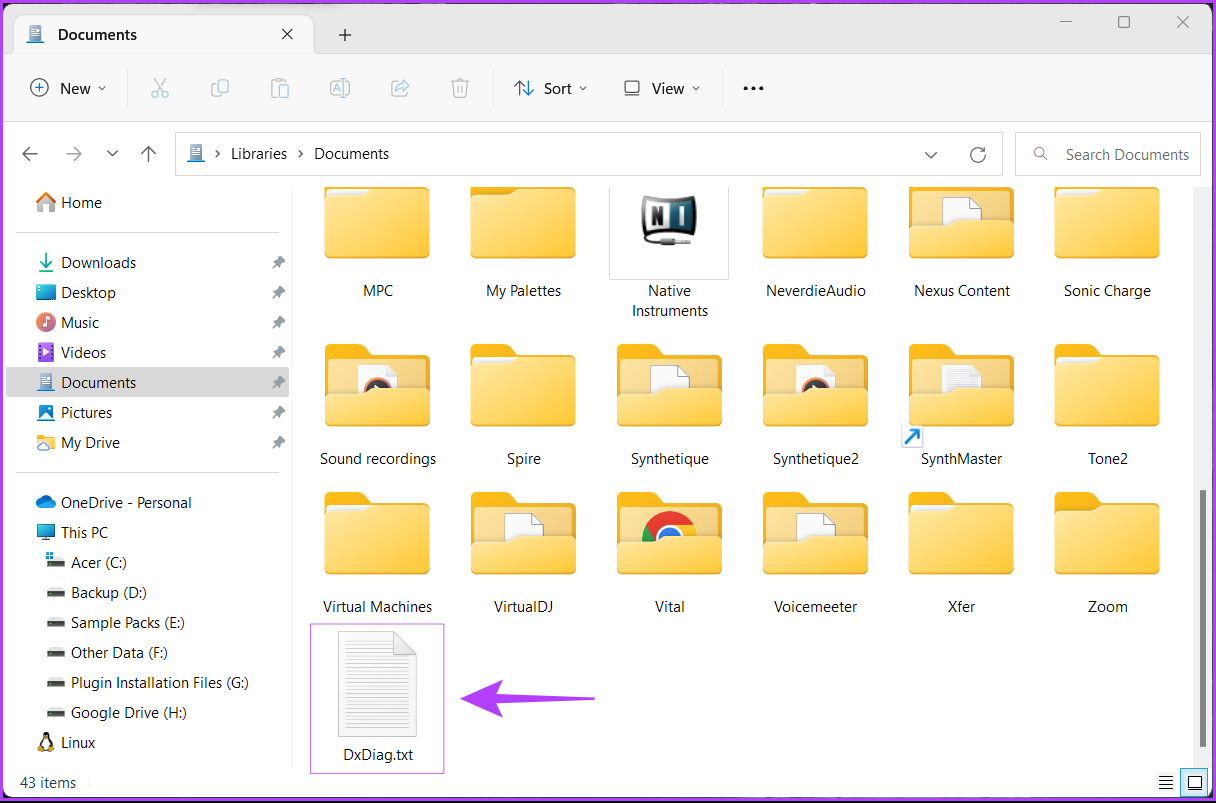
Step 4:Open the File Explorer and navigate to the location where you saved the DxDiag.txt file. Then, double-click to open it.
Step 5: When the DxDiag.txt file opens in Notepad, scroll down and look for an entry called Miracast.
You won’t see such an entry if your Windows 11 PC doesn’t support Miracast.
4. Using Windows PowerShell
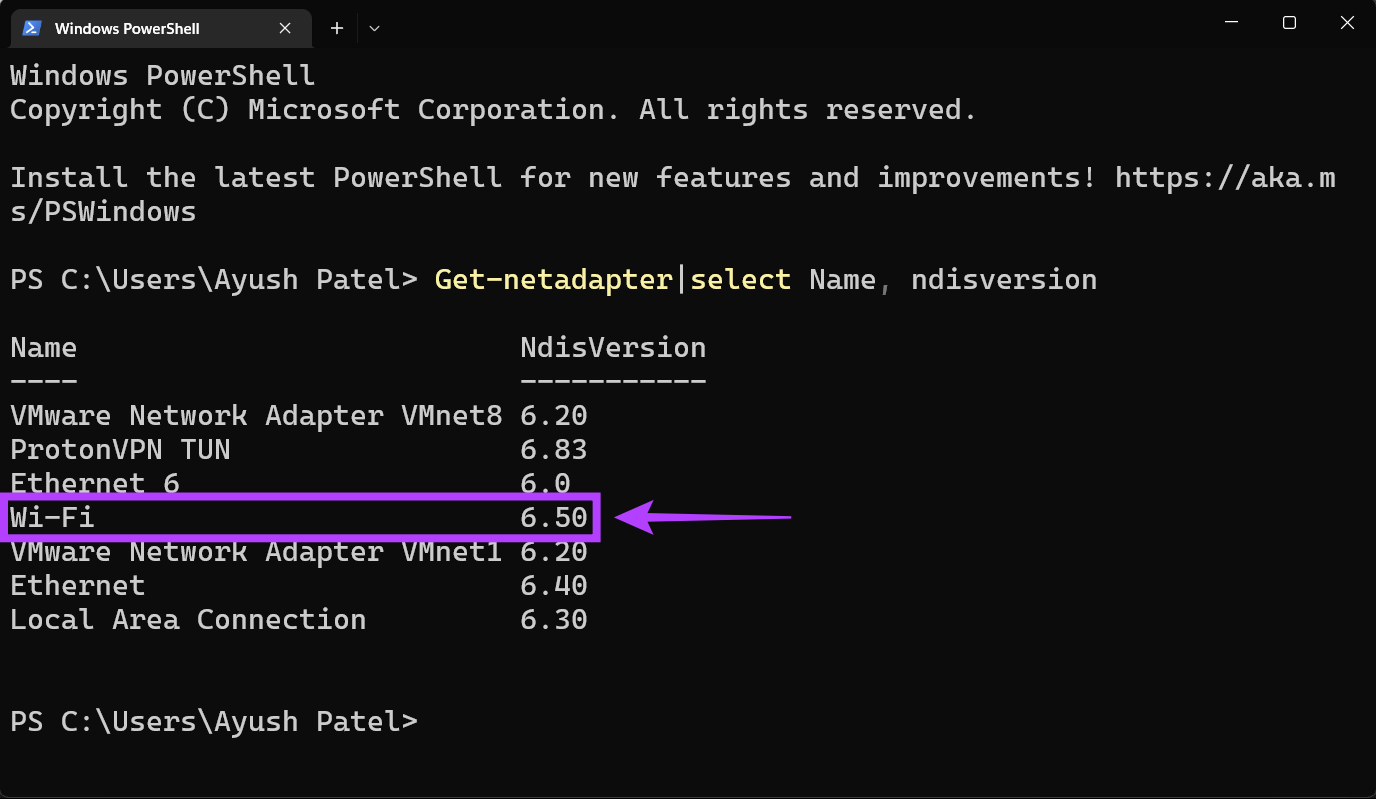
If you’re comfortable using the Windows PowerShell, it can be helpful to quickly figure out whether your PC supports Miracast. For that, you can run command in PowerShell. Here’s how to do it. Step 1: Click on the Windows Search button, and type Windows PowerShell. From the search results, click on the Open option for the Windows PowerShell app.
Step 2: Copy and paste the command below into Windows PowerShell, then press Enter:
Step 3: Check the NdisVersion column for the number next to the Wi-Fi. If the NdisVersion of your PC is 6.30 or above, your system should be Miracast compatible.
5. Using Command Prompt
The Command Prompt in Windows is also useful to figure out whether your computer supports Miracast or not. Of course, the command will be different than the one for Windows PowerShell. Here’s how to use Command Prompt to check for Miracast support: Step 1: Click on the Start button and type Command Prompt. From the results for Command Prompt,
Step 2: Inside the Command Prompt window, type the following command and hit Enter:
Step 3: Scroll down till the ‘Wireless Display Supported’ section and check if it says ‘Yes, (Graphics Driver: Yes, Wi-Fi Driver: Yes).’
Confirm if Your Windows 11 PC Supports Miracast
These are the different methods to check if your Windows 11 PC supports Miracast. After you verify that, the next step is to configure the Wireless Display setup between your PC and the external display where you want to mirror your Windows 11 PC. However, ensure your PC and the other display connect to the same Wi-Fi network.


