But if the Autocorrect feature stops working, you will have to edit all your typing errors manually. To overcome that, we have compiled the best ways to fix Autocorrect not working on Android.
1. Check if Spell Checker Is Enabled
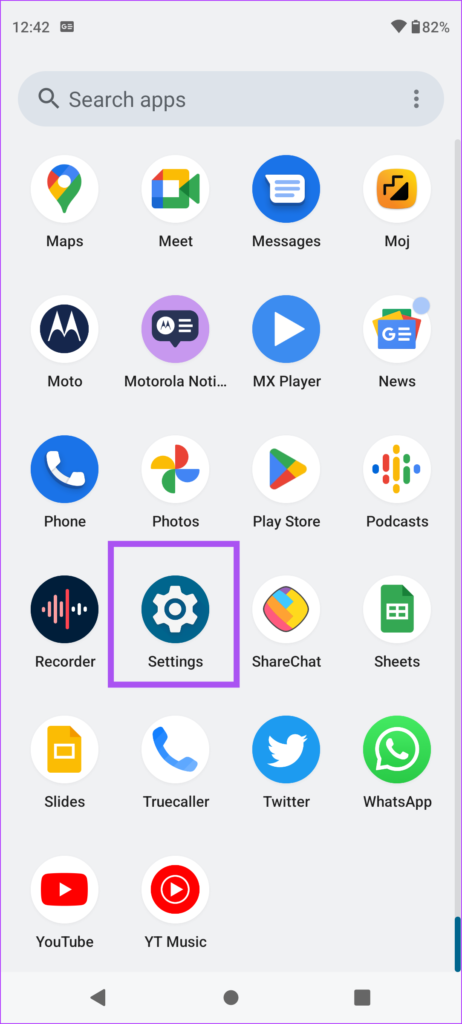
Your Android phone comes with the Spell Checker functionality that checks and removes spelling errors while you type. So it’s a good idea to check whether the Spell Checker is enabled on your phone. Step 1: Open Settings on your Android phone.
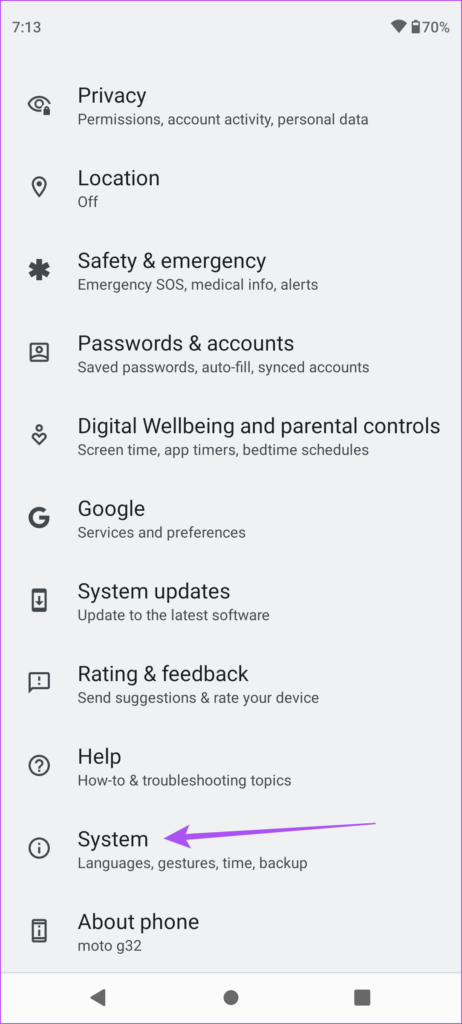
Step 2: Scroll down and go to System.
Step 3: Tap on Languages and Input.
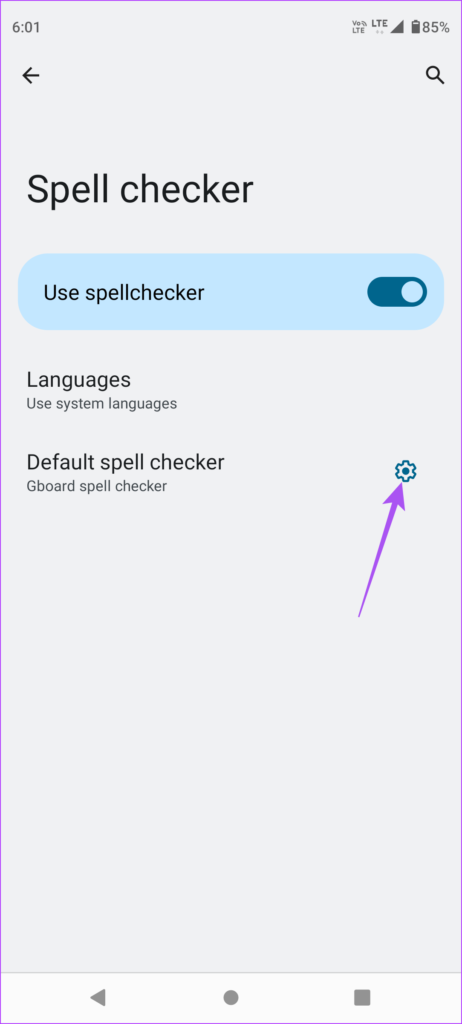
Step 4: Tap on Spell Checker.
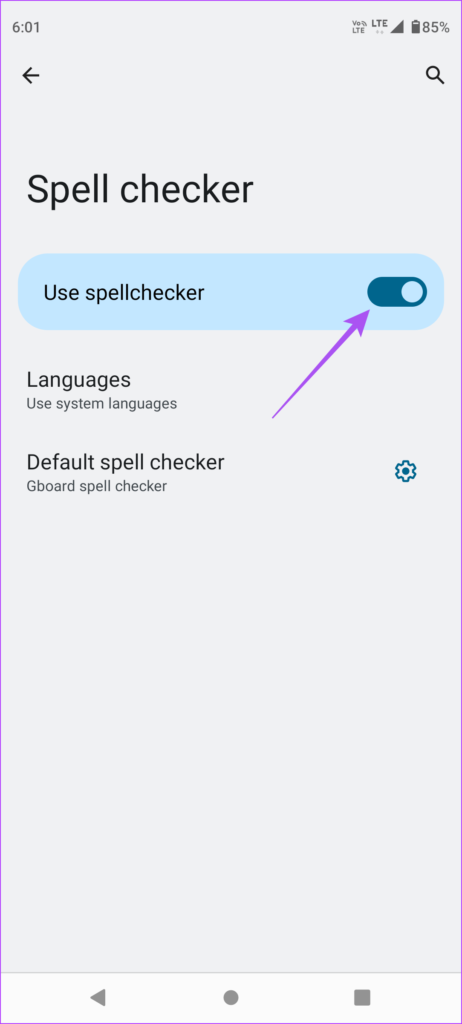
Step 5: Tap the toggle next to ‘Use Spellchecker’ to enable the feature.
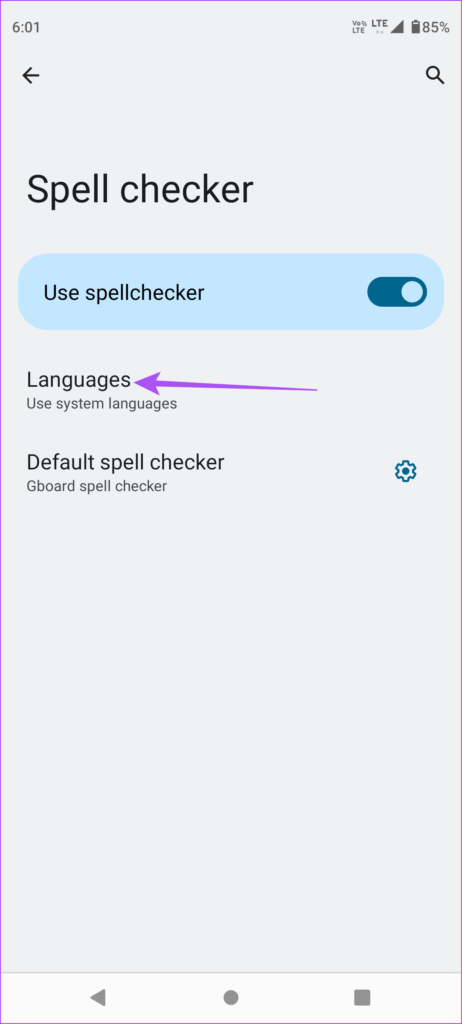
Step 6: Tap on Languages and ensure that your preferred language is selected for Spell Checker.
Step 7: Close the Settings app and launch your Android keyboard to check if the problem is solved.
2. Enable Grammar Check for Your Keyboard.
After spelling, the next step is to enable Grammar Check for your keyboard. Correction of grammatical errors is also an important function of Autocorrect on the Keyboard of your Android phone. If you are using the default Gboard on your Android phone, here’s how you can check and enable the feature. Step 1: Open Settings on your Android phone.
Step 2: Scroll down and go to System.
Step 3: Tap on Languages and Input.
Step 4: Tap on Spell Checker.
Step 5: Tap the Settings icon next to ‘Default Spell Checker.’
Step 6: Tap the toggle next to Grammar Check to enable the feature.
Step 7: Close the Settings app and launch your Android keyboard to check if the problem is solved.
3. Check Autocorrect Settings for Your Keyboard
If you are still encountering grammatical or spelling errors while typing with your Android keyboard, we recommend checking the Autocorrect settings for the Keyboard that you are using. We have listed the steps to check these settings for two popular Android keyboards – Gboard and Microsoft SwiftKey.
Check Autocorrect Settings in Gboard
Step 1: Open Settings on your Android phone.
Step 2: Scroll down and go to System.
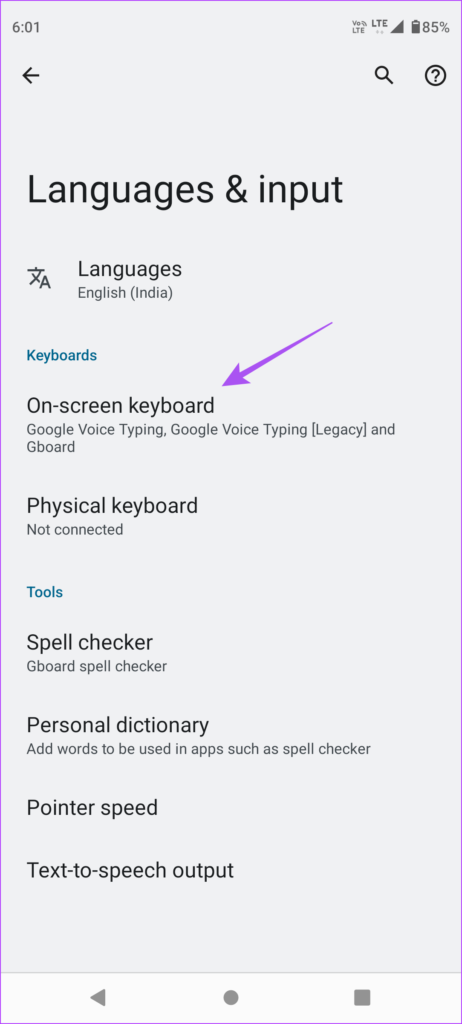
Step 3: Tap on Languages and Input.
Step 4: Tap on On-Screen Keyboard.
Step 5: Select Gboard.
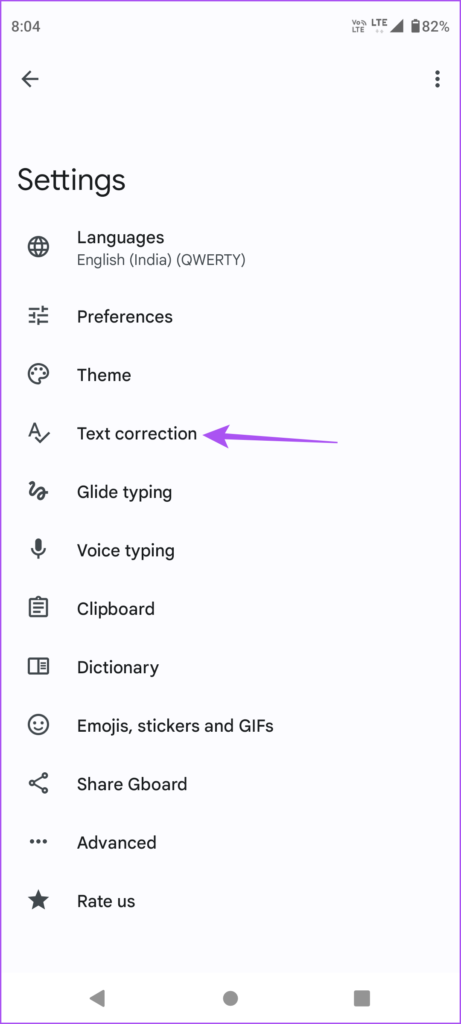
Step 6: Tap on Text Correction in Gboard Settings.
Step 7: Under Corrections, check if you have enabled options like Auto-correction, Auto-capitalization, and Auto-space After Punctuation.
Step 8: Close Gboard Settings and launch Gboard to check if the problem is solved.
Check Autocorrect Settings in Microsoft SwiftKey
Step 1: Open Microsoft SwiftKey on your Android phone.
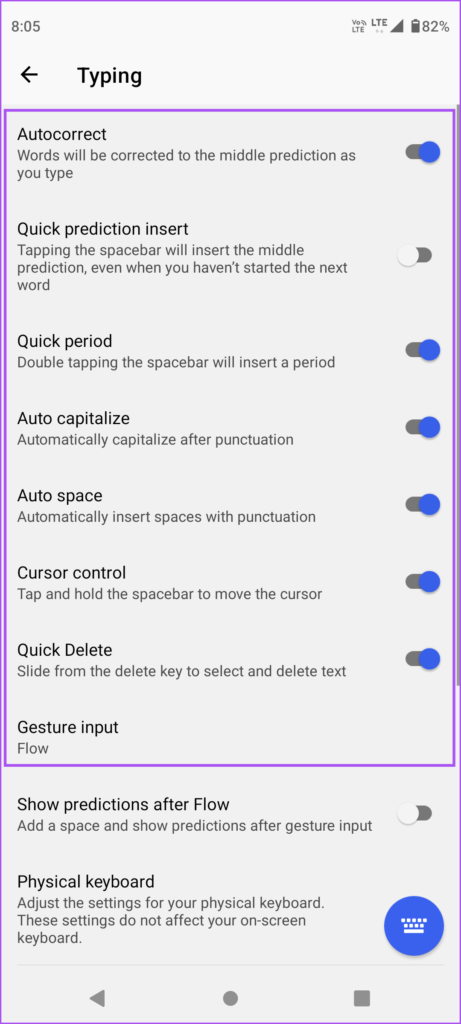
Step 2: Tap on Typing.
Step 3: Check if you have enabled Autocorrect, Auto Capitalize, and Auto Space.
After enabling them, close Microsoft SwiftKey and launch the SwiftKey keyboard to check if the problem is solved.
4. Force Quit and Relaunch Keyboard
If you still face Autocorrect problems, you can try to force quit and relaunch your Android keyboard. The steps provided below and the same for Gboard, Microsoft SwiftKey, and every other popular keyboard app for Android. Here’s how to do it. Step 1: Open Settings on your Android phone.
Step 2: Tap on Apps.
Step 3: Tap on See All Apps.
Step 4: Tap on Gboard from the list of apps.
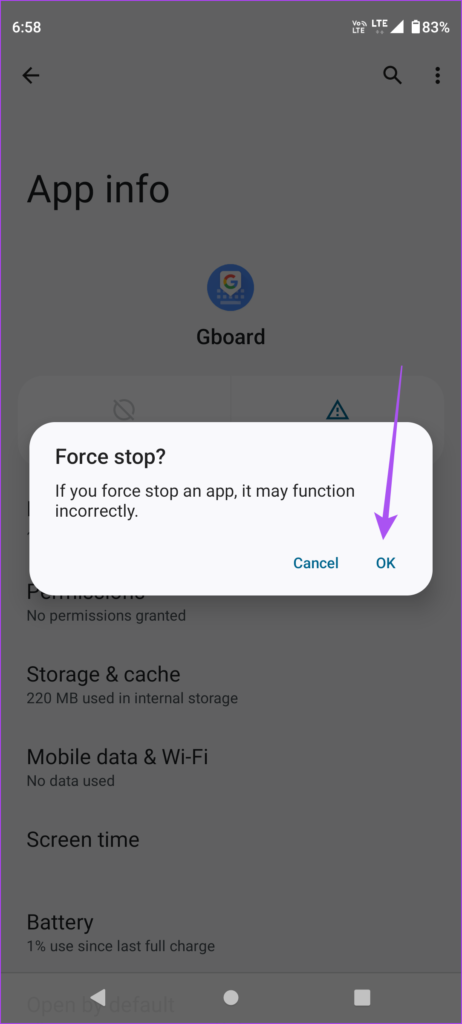
Step 5: Tap on Force Stop.
Step 6: Tap on Ok to confirm your choice.
Step 7: Close the Settings app and relaunch the keyboard to check if the problem is solved.
5. Update Your Android Keyboard
The last resort to fix the problem is to update your Android keyboard. The current version might contain a bug or glitch causing this issue on your Android phone. Step 1: Open the Play Store on your Android phone.
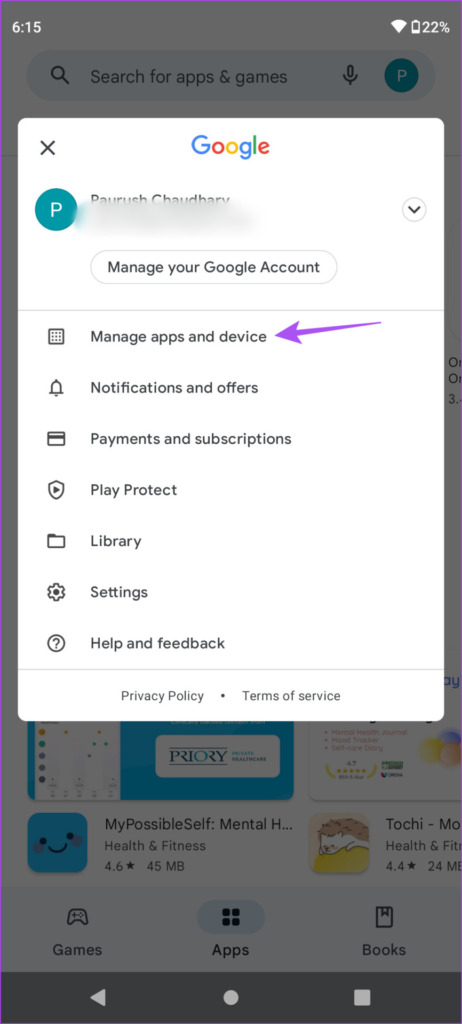
Step 2: Tap on your profile icon at the top-right corner.
Step 3: Select Manage Apps and Device.
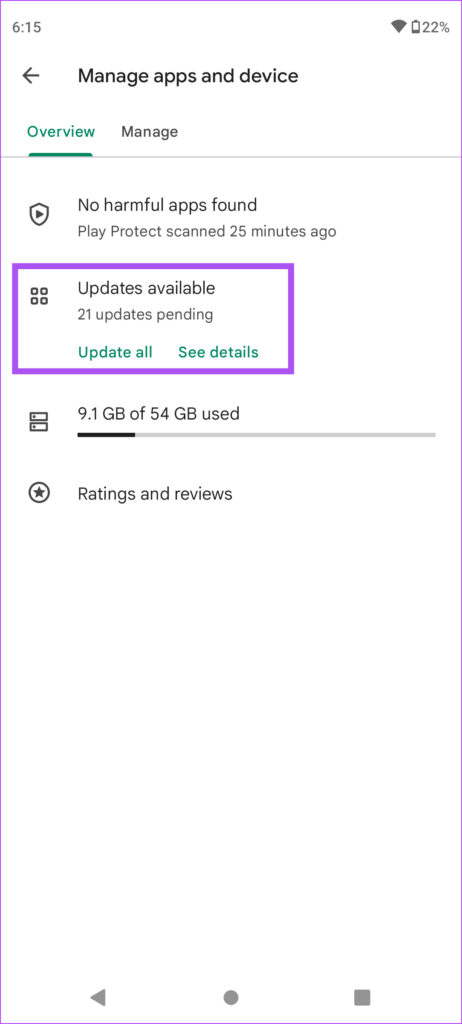
Step 4: Tap on Updates Available.
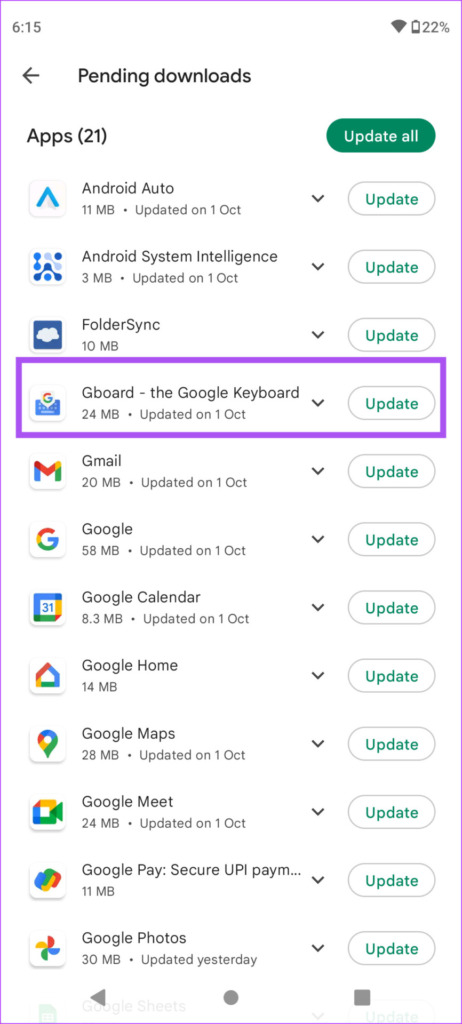
Step 5: Tap on Update next to your Android keyboard app.
After the update installs, launch the keyboard and check if the problem is solved.
That’s Correct
The Autocorrect feature going wrong can be your biggest nightmare! But these solutions will help you get rid of any troubles with the feature on your Android phone.












![]()
