Furthermore, bulk renaming saves time as well as allows for easier file management and organization. The most crucial part of mass renaming files is that you don’t want to worry about misnaming any of them. In this article, we will talk about 4 different ways to batch rename files on Windows 11 to help you sort out things efficiently. Let’s start with the easiest one. Tip: If you’re using a Mac, you can check this article to learn the best ways to rename multiple files at once on Mac.
How to Rename Files in Bulk on Windows 11 Using File Explorer
This is the easiest way to rename multiple files on Windows 11. Let’s show you how. Step 1: Open File Explorer and navigate to the files and folders you want to rename.
Step 2: Click on the View tab and select Details.
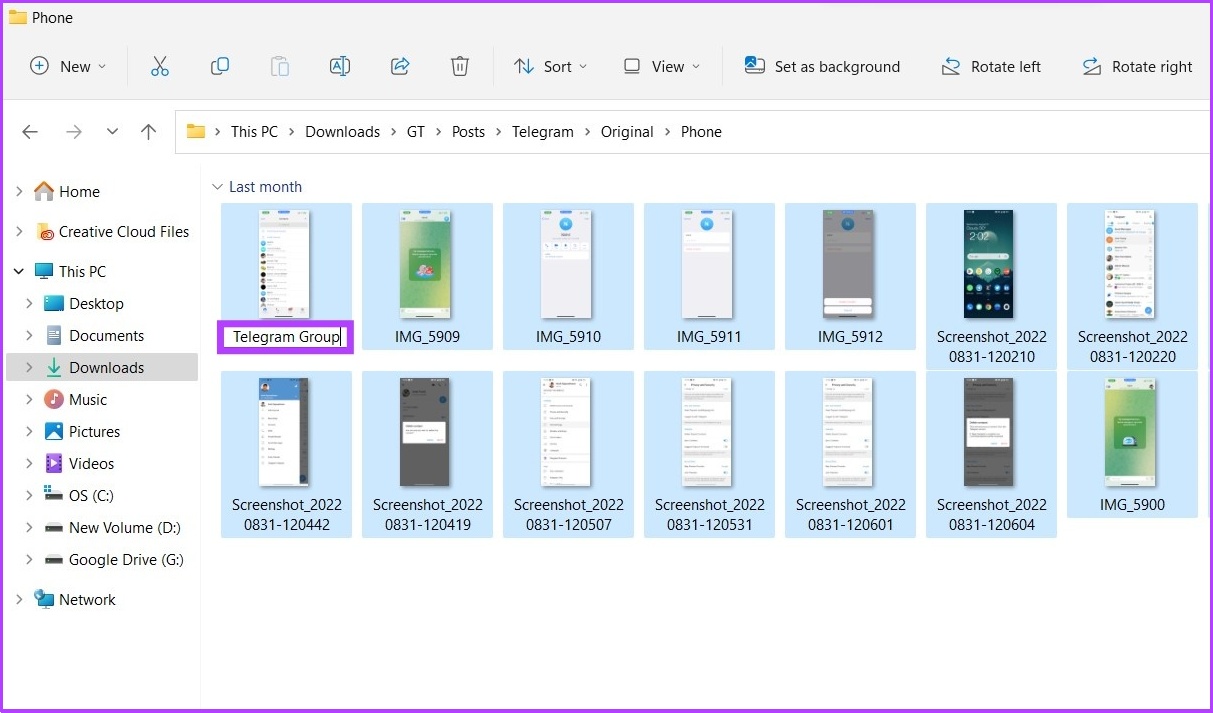
Step 3: Select all the files you want to rename. Then, go to the Home tab and click the Rename button. Alternatively, you can select the first file, press and hold the shift key, and click the last file to select all files, or simply press ‘Ctrl + A.’
Step 4: Rename the first file and press Enter.
That’s it! The selected files will be renamed using the name of the structure you specified, with a count number in parentheses to make each file name different. Ex: telegram group (1).jpg, telegram group (2).jpg, and so on. If you’re on a Mac, our guide on creating and renaming folders will be helpful.
How to Rename Multiple Files at Once on Windows 11 Using Command Prompt
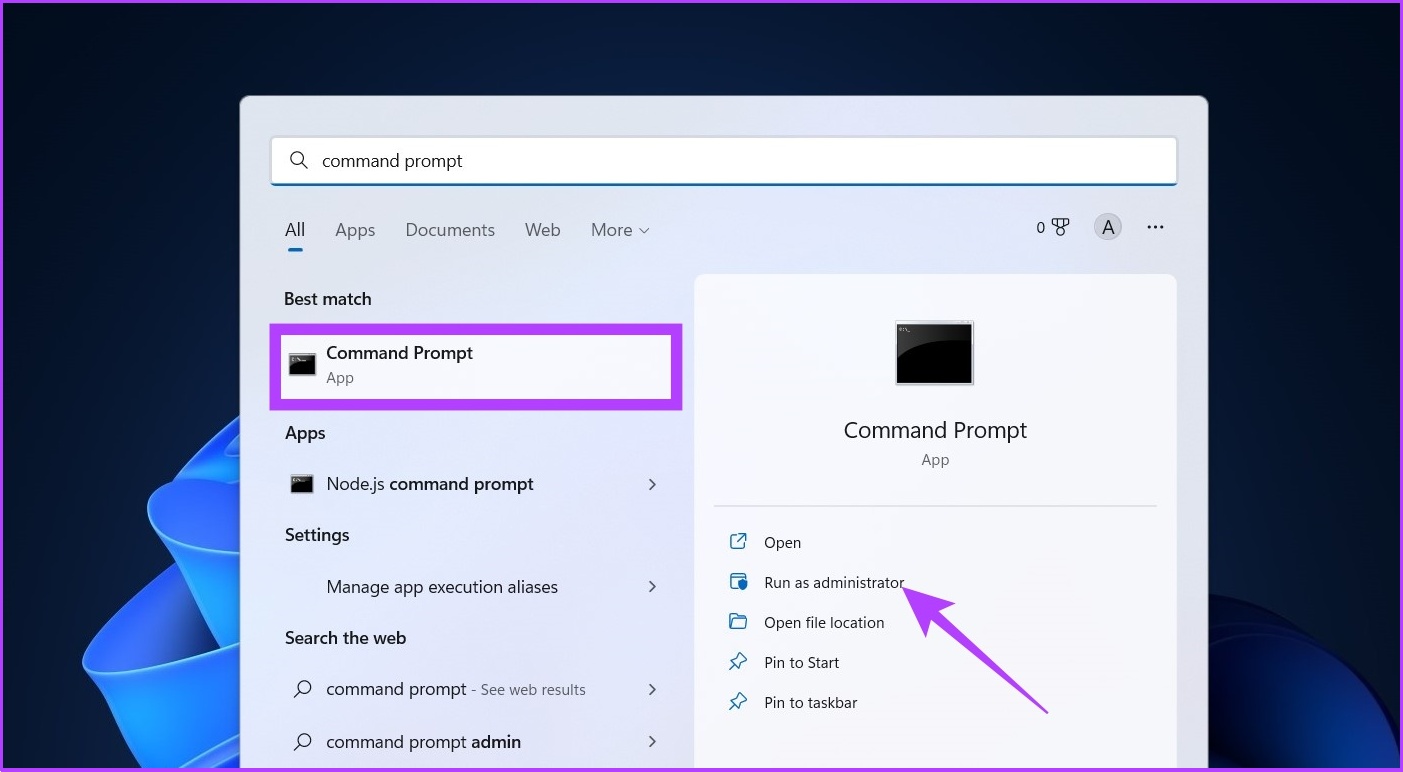
It’s kind of unconventional, but Windows also offers a way to mass rename files via the Command Prompt. Follow the below instructions: Step 1: Open Windows Search, type Command Prompt, and press Enter. Press Yes on the prompt.
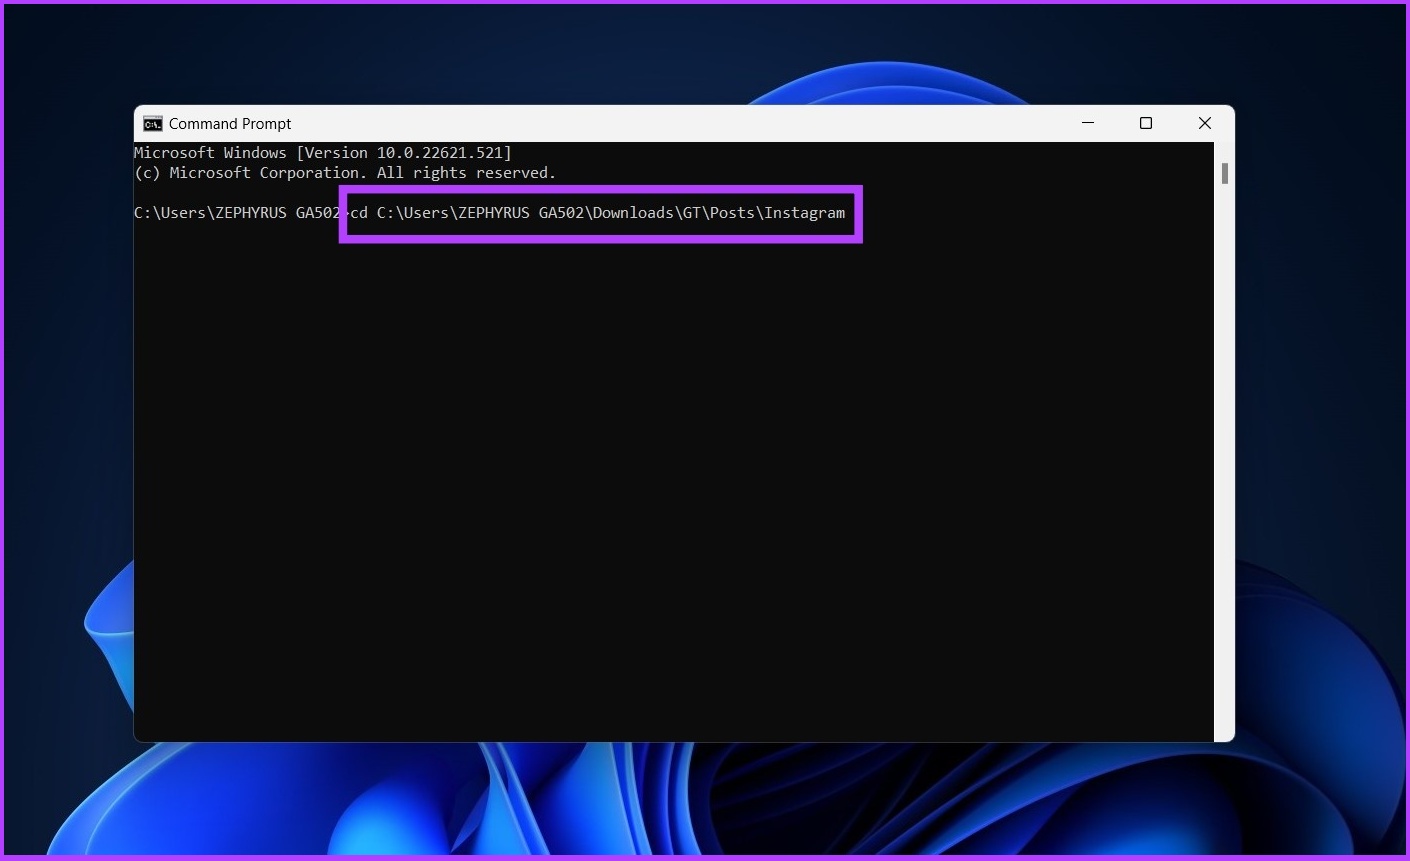
Did you know? There are 7 quick ways to open Command Prompt on Windows. Step 2: In Command Prompt, type the following command ‘cd c:\PATH\TO\FILES’. In PATH\TO\FILES, copy the location of the file or folder and paste it. Ex: ‘:cd %USERPROFILE%\Documents\files’.
Step 3: Now, type ‘ren .FILE-EXTENSION ???-FILE-NAME.’ to rename the files in bulk and press Enter. The asterisk (*) tells the command to rename everything with a specific extension, while the question mark (?) represents a character of the original name you want to keep as part of the new name. Enter the file extension in ‘FILE-EXTENSION’ and enter rename file in ‘-FILE-NAME’. Ex: .jpg ???-resetinstagram.
And there you go. All the files you selected will be renamed.
Mass Rename Files in Windows 11 Using Powershell
Step 1: Open Windows Search, type PowerShell, and click ‘Run as Administrator.’
Press Yes on the prompt. Step 2: In the PowerShell, type the following command ‘cd PATH\TO\FOLDER’ In PATH\TO\FILES, copy the file’s or folder location and paste it. Ex: ‘:cd %USERPROFILE%\Documents\files’.
Step 3: Now type the following command ‘ls | %{Rename-Item $_ -NewName (“NEW-FILE-NAME-{0}.EXTENSION” -f $nr++)}‘.
Replace ‘NEW-FILE-NAME’ with the actual structure name you want to use and add the proper file extension in place of ‘EXTENSION’. And that’s it. Following the above steps will rename the selected files with the specified format. If you’re confusing PowerShell with Command Prompt, they’re both same same but different. Confused? Check our guide explaining the difference between Command Prompt and Powershell.
Using Microsoft’s PowerToys to Batch Rename Files in Windows 11
The Windows default file renaming works for almost everyone, but for users looking for more customization and a bit more options to bulk modify files, there is PowerToys. As its name suggests, it is for power users. It offers batch rename files on Windows 11 using a tool called PowerRename, which is far more capable than the default tool on Windows 11. All said, follow the below instructions to rename multiple files at once using PowerToys. Step 1: Download PowerToys from GitHub using the below link and install it. Download from GitHub
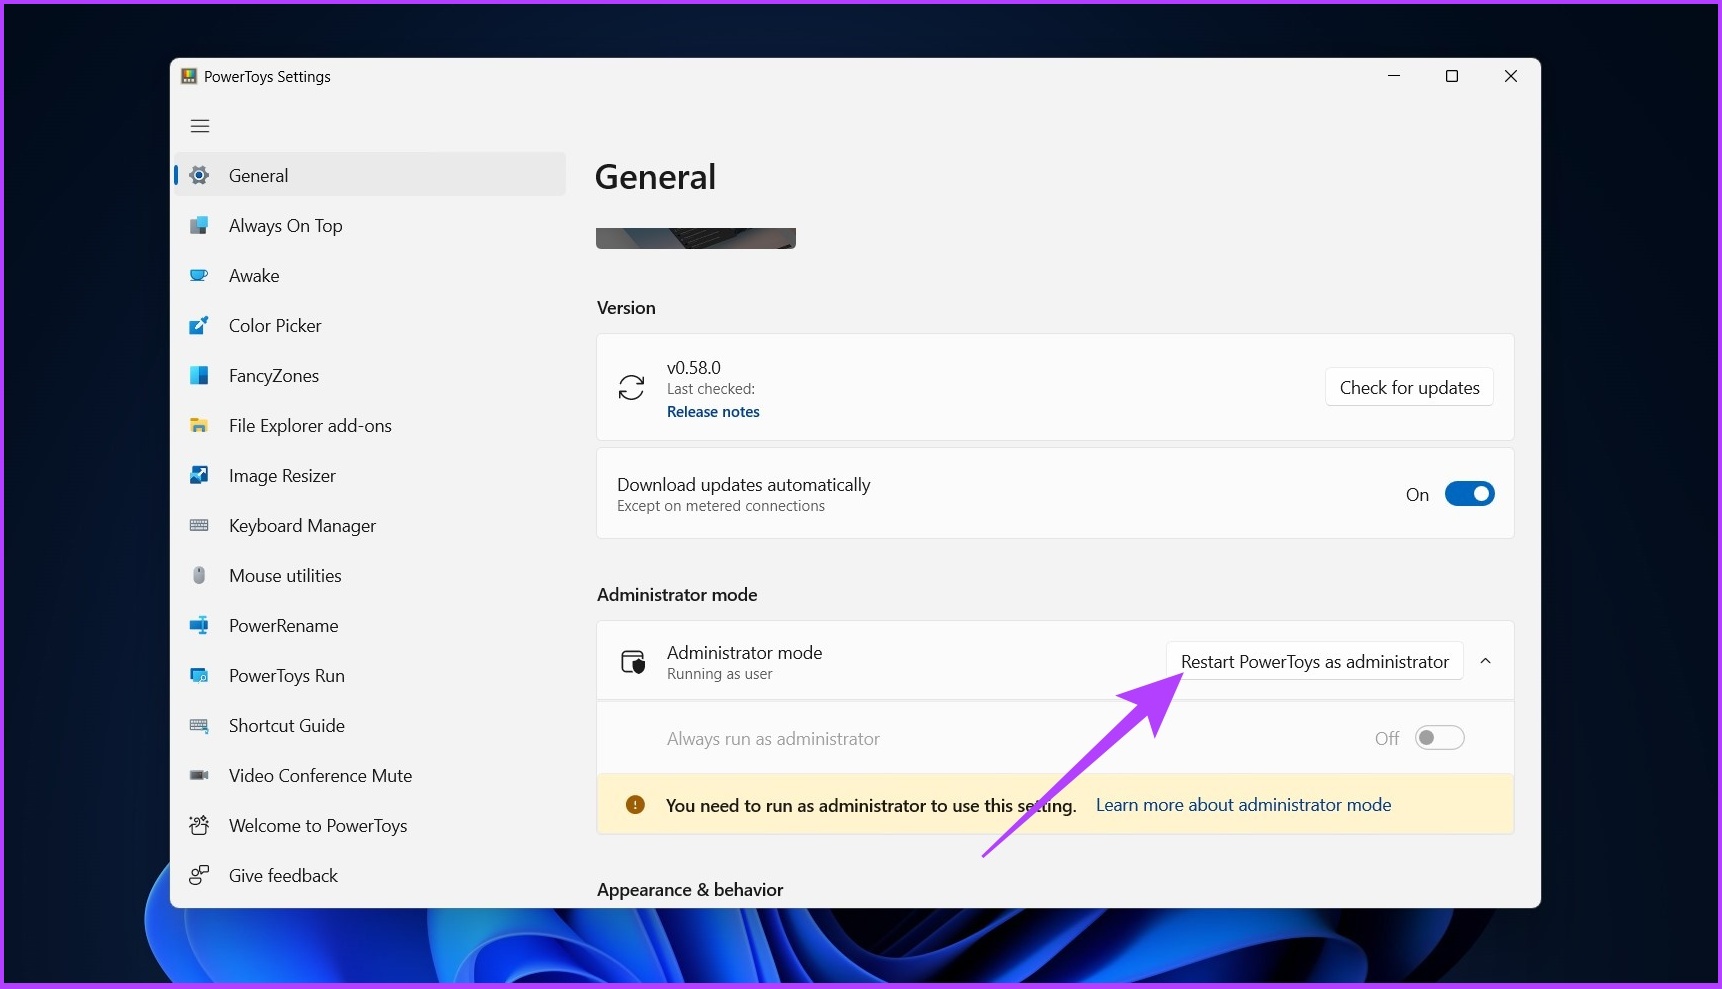
Step 2: Open PowerToys, and under Administrator mode, click on ‘Restart PowerToys as administrator.’
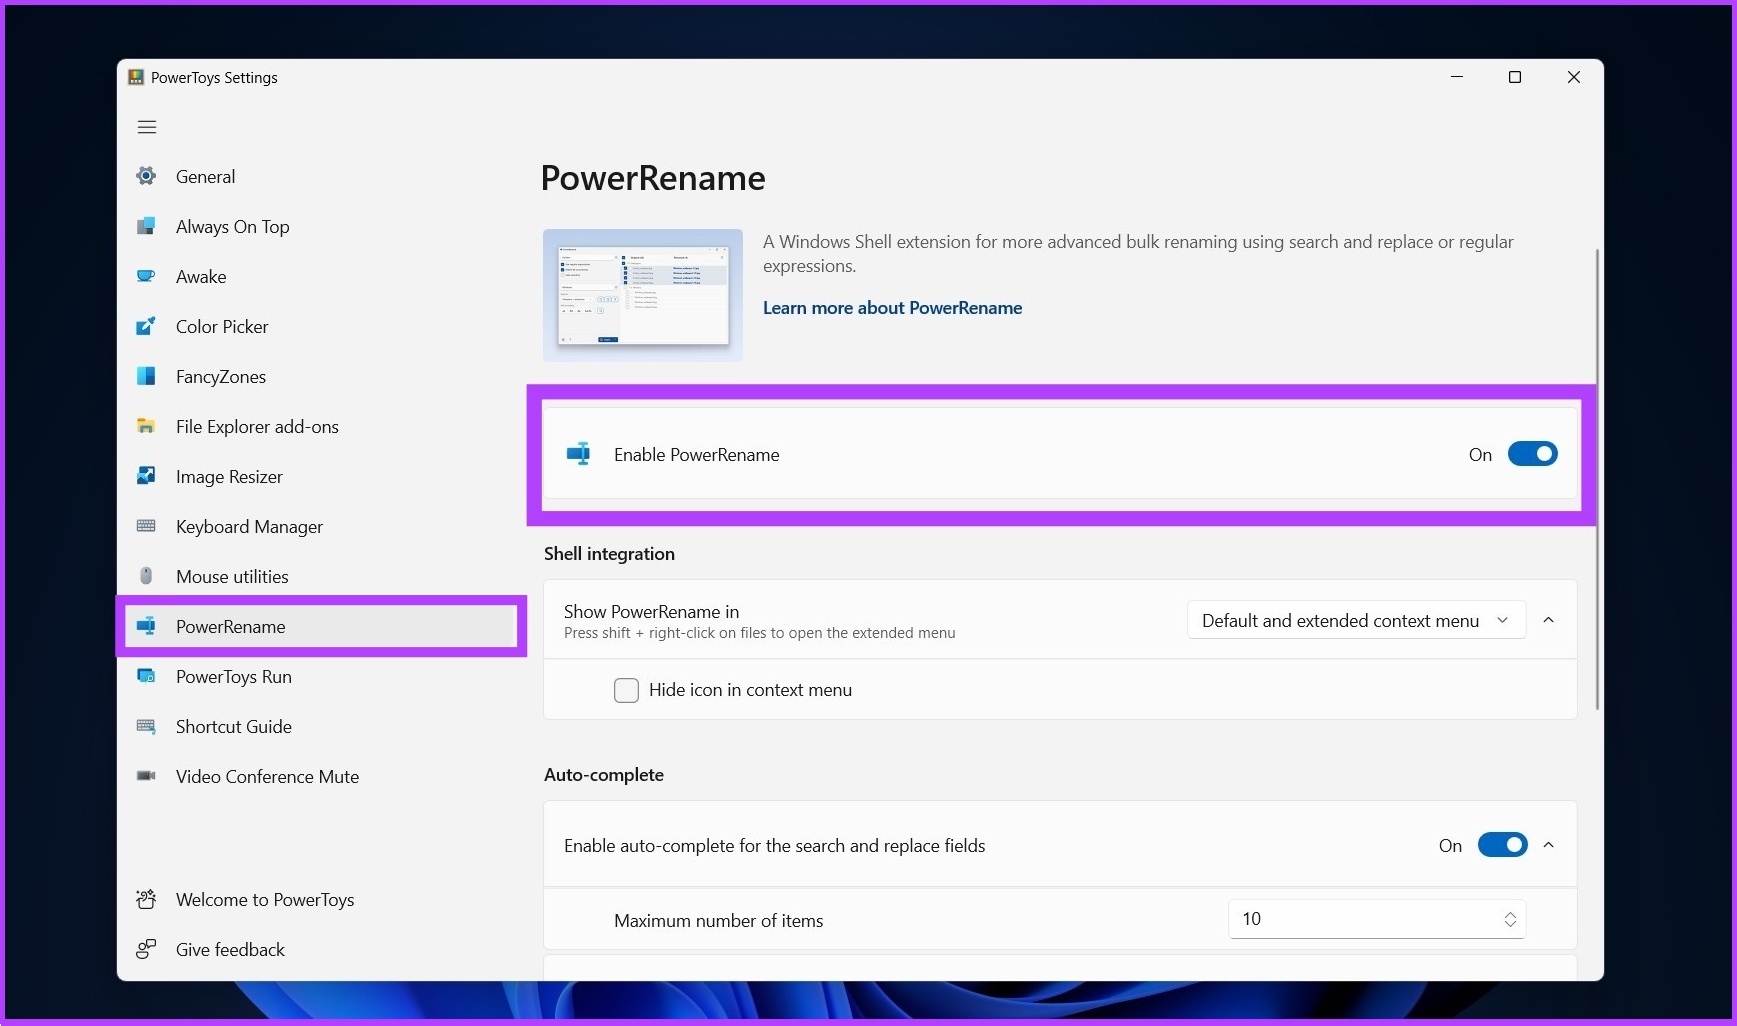
Step 3: The app will restart automatically. Once open, choose PowerRename from the side menu, and turn on the toggle for Enable PowerRename, if not already.
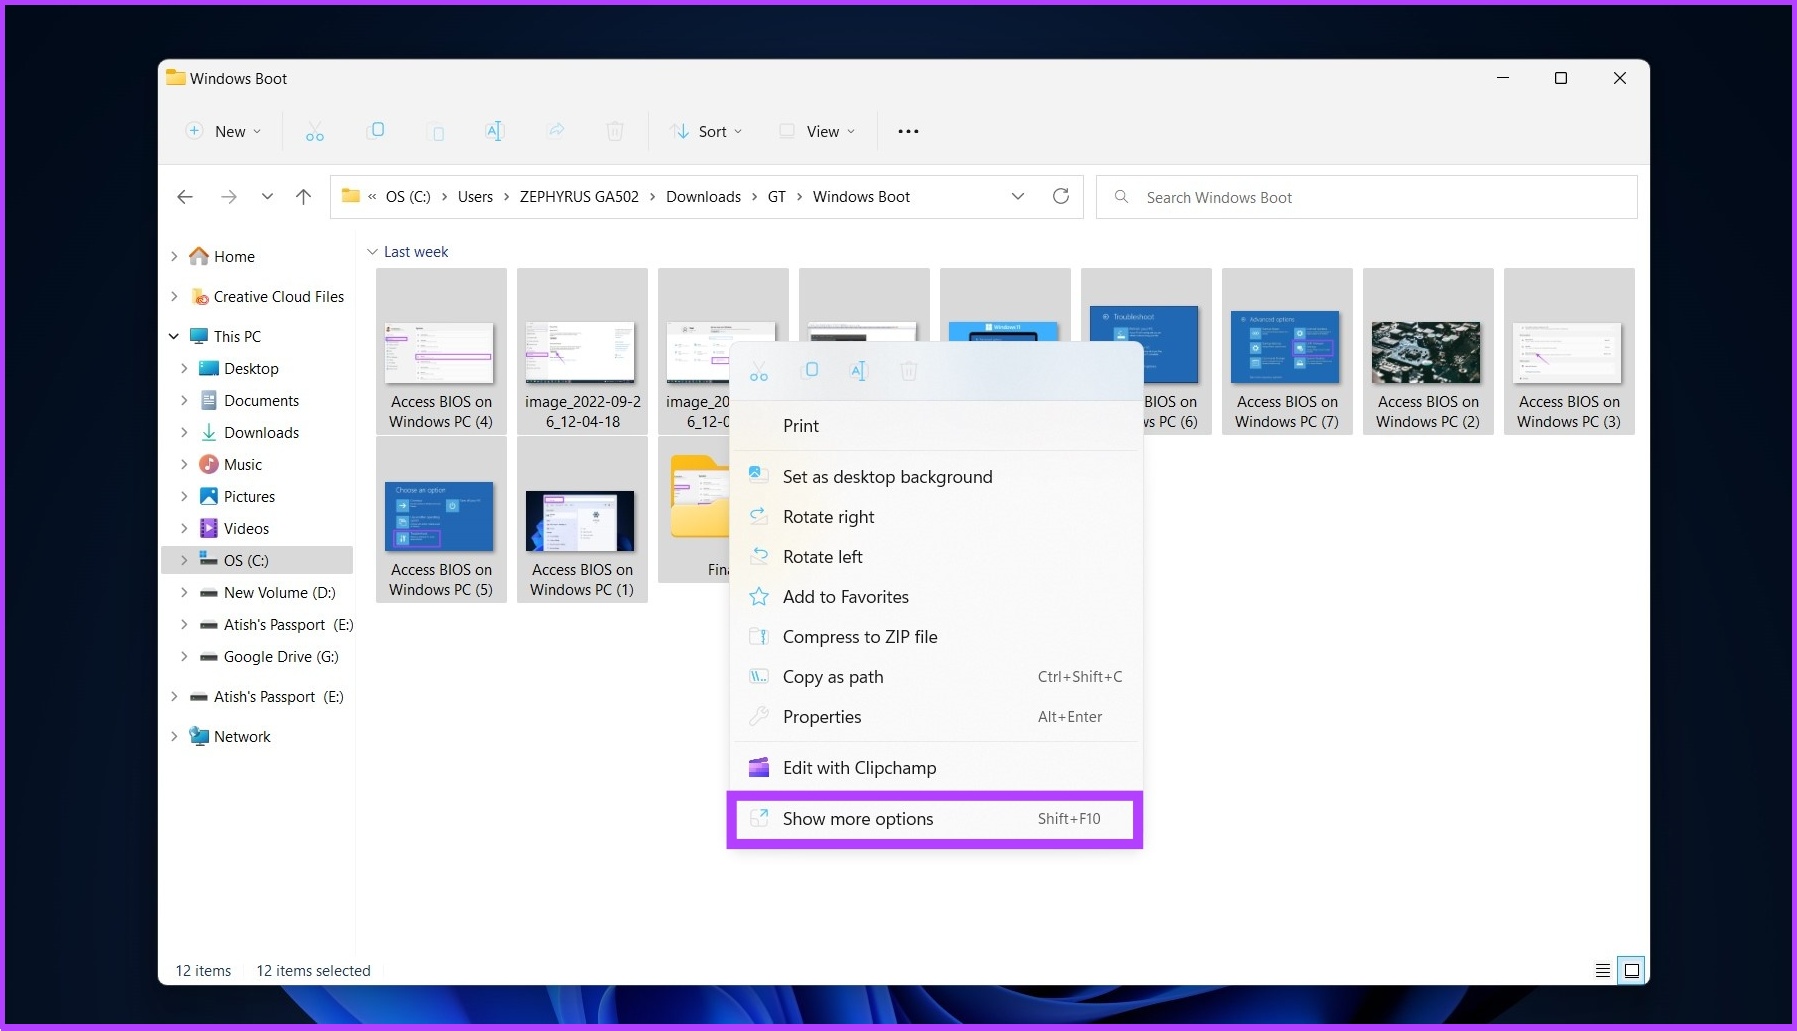
Step 4: Navigate to the files you want to rename, select them all, right-click and choose ‘Show more options.’
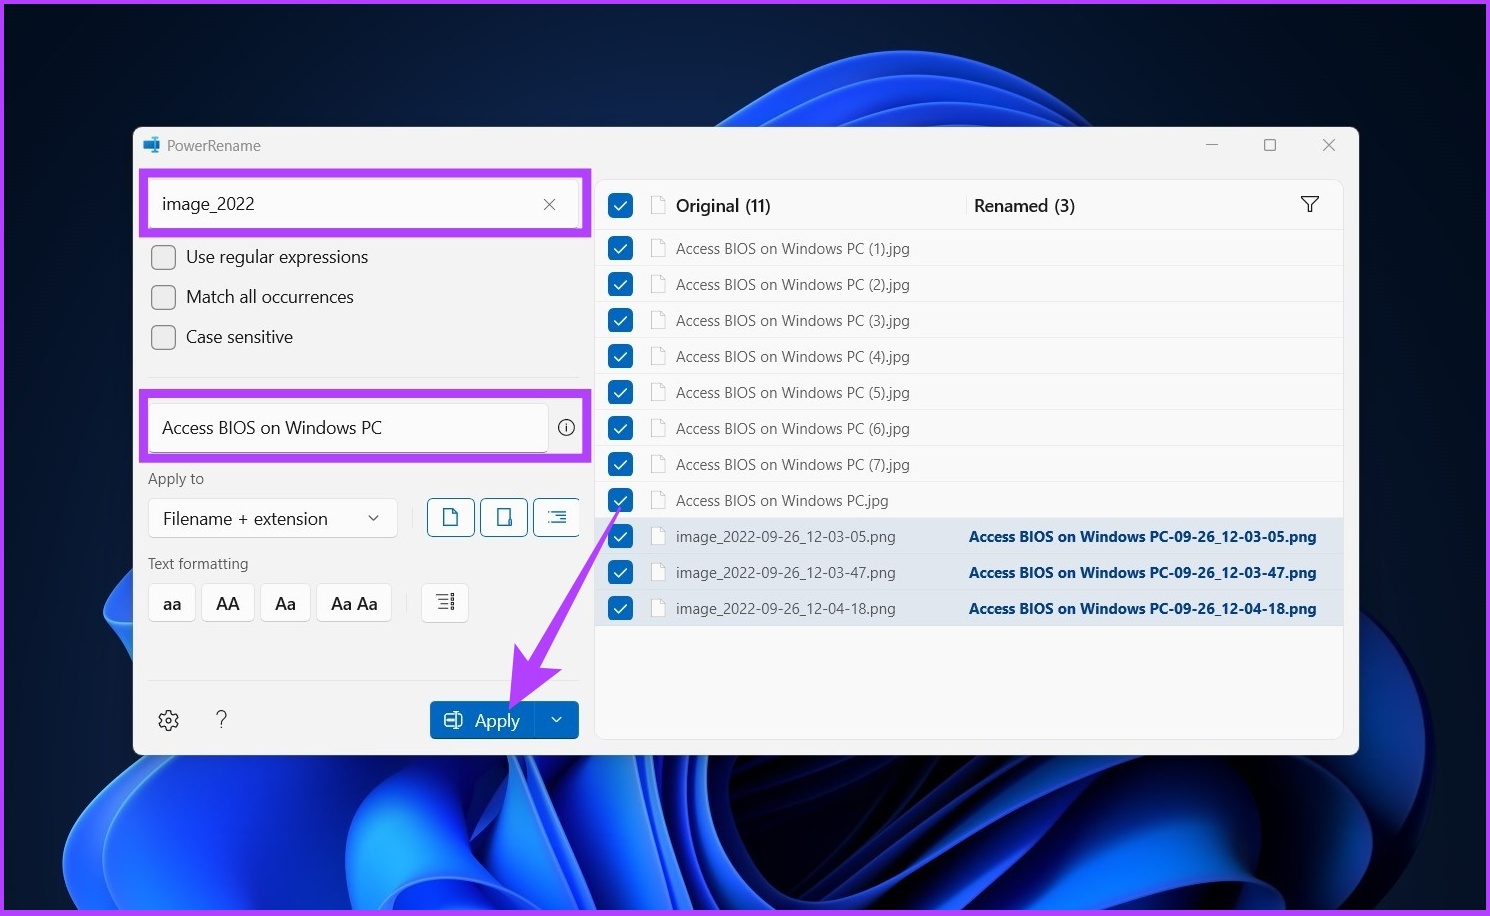
Step 5: Now, choose PowerRename to open all selected files on the PowerRename interface.
Step 6: Choose the current file names to be replaced with a new file name and click Apply. Example: image_2022 to be replaced by ‘Access BIOS on Windows PC’
So there you have it. All the file names will be changed in a go.
There are many tools available for batch renaming files, including Bulk Rename Utility and Advanced Renamer. However, the interfaces of these tools are complex, and they do not offer easy ways to carry out the renaming process. Therefore, we recommend using the tools mentioned in this article to batch rename files in Windows efficiently.
Windows Batch File Rename Made Easy
There are various ways to batch rename files on Windows 11. All the listed ways to rename files are practical and efficient. You can select the method that is most convenient for you or the easiest for you to complete your task.